Getting started
Viking Two is a portable test instrument that lets you safely function-test, troubleshoot and document Mode 3 Type 2 EV charging stations. The device talks to the free mobile app over Bluetooth.
1. Charge the device
Make sure your Viking Two test device is charged. You can check the battery level in the app menu.
2. Install the app
Install the Viking Two app from the App Store (iOS) or Google Play (Android) and allow Bluetooth and Location when asked.
3. Plug into the station
Connect the Viking Two device to the charging station's Type 2 socket, exactly like plugging in a car.
4. Open the app
Turn on the device, open the app, and it will search for your Viking Two automatically.
Connecting to a Viking Two device
When you open the app it scans for nearby Viking Two devices over Bluetooth.
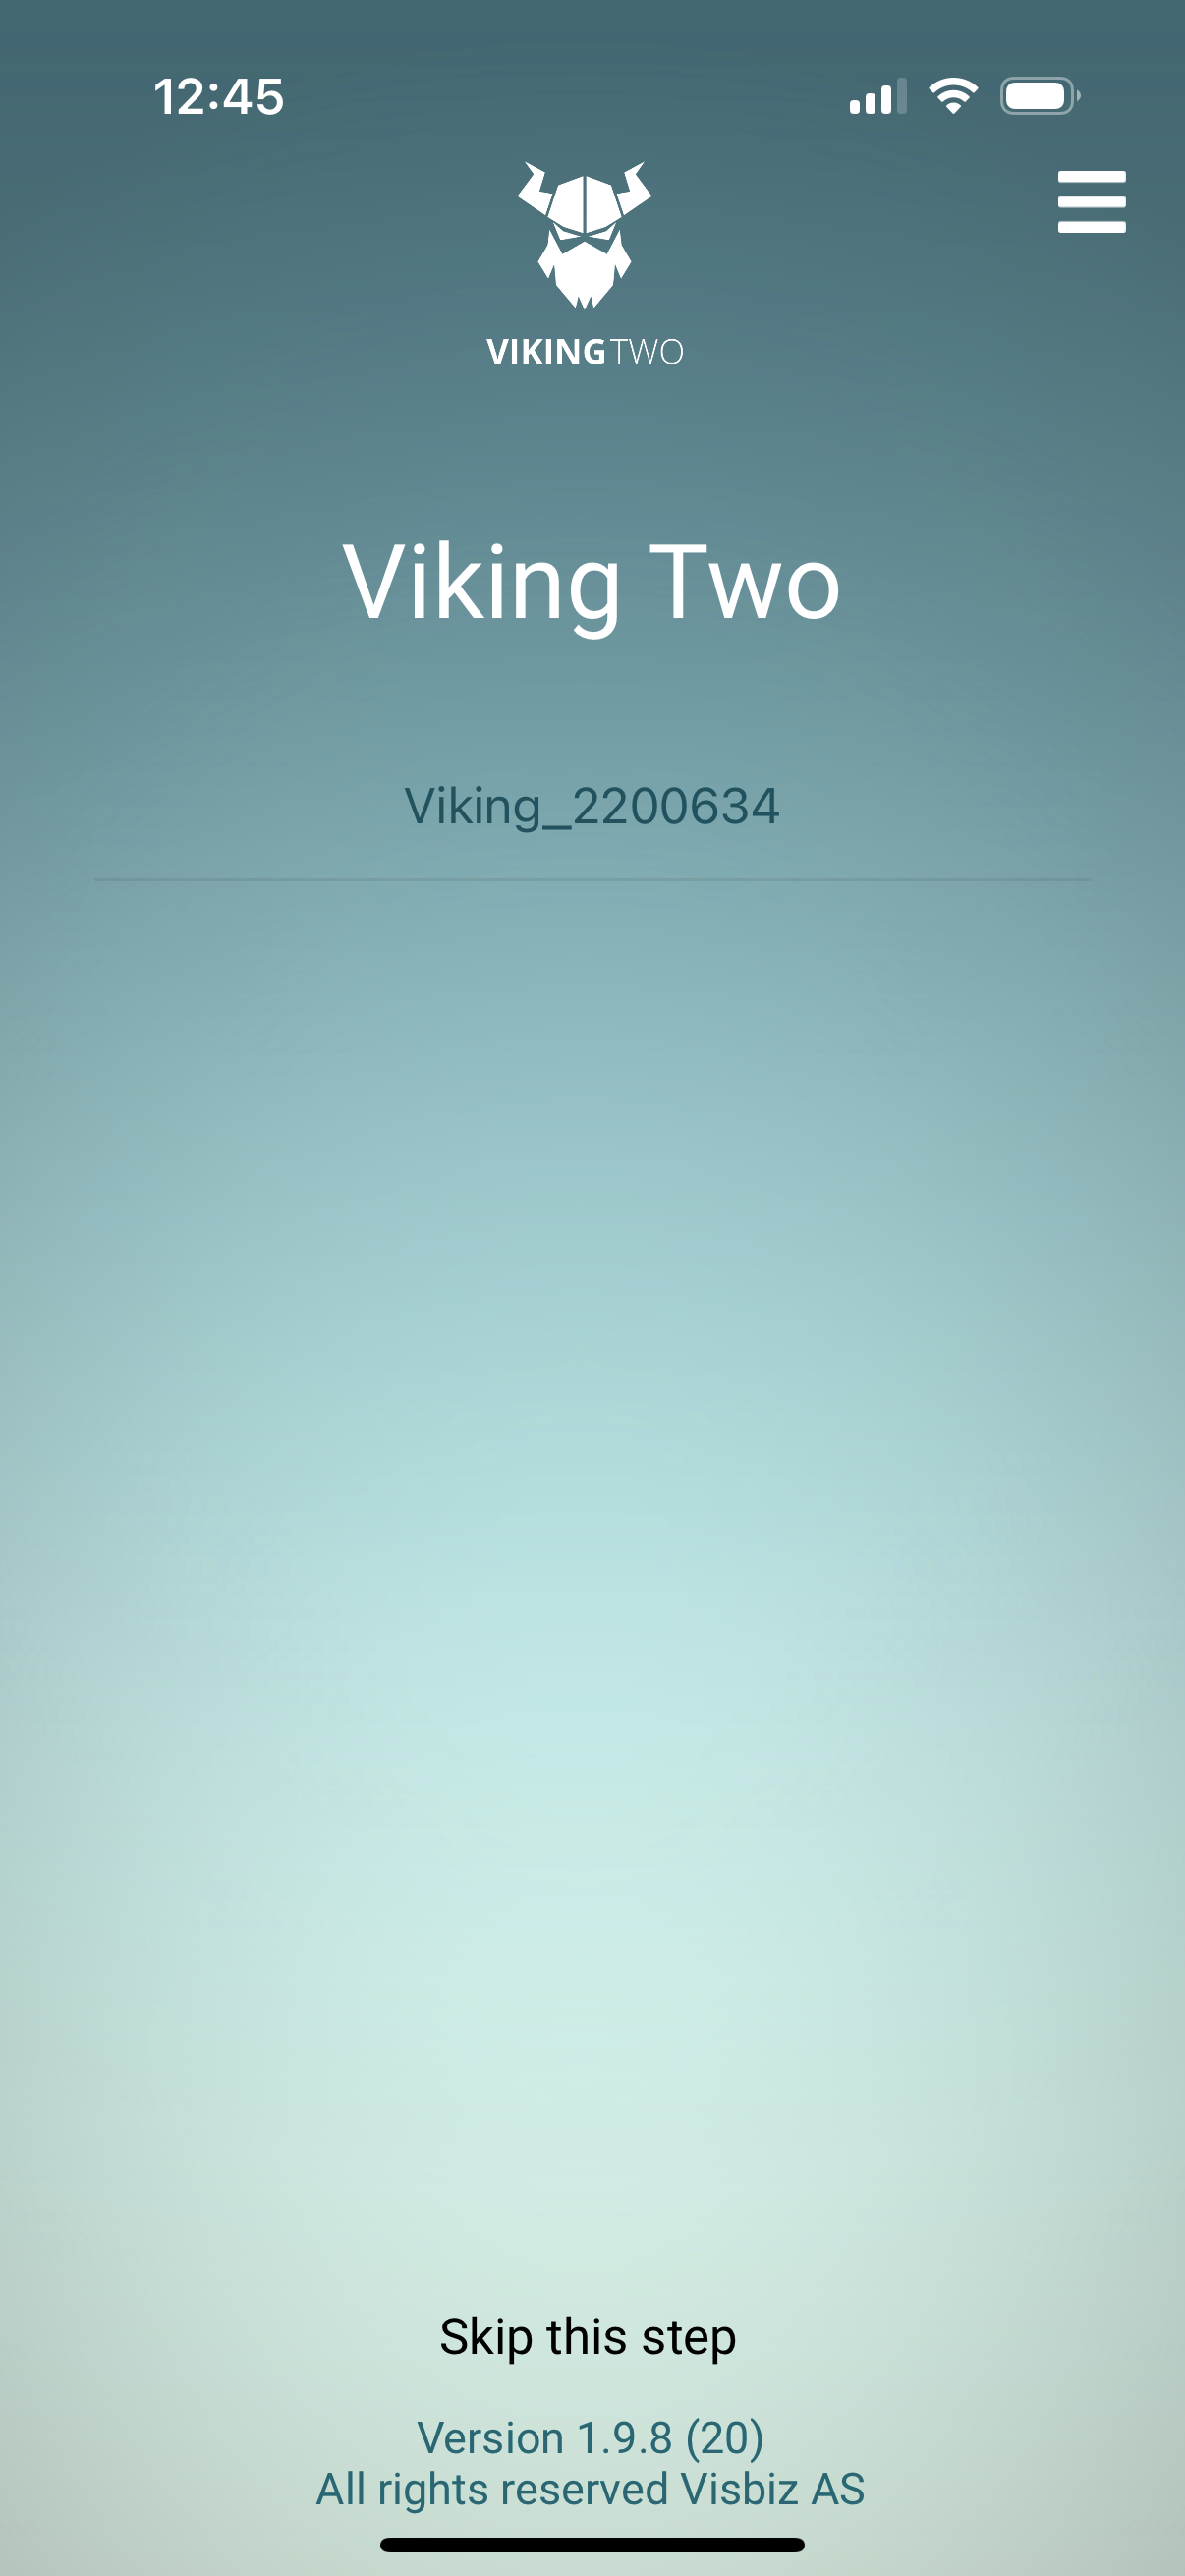
1 Pick your device
Any Viking Two devices that are switched on nearby appear in the list (for example Viking_2200634 — the number matches the device's serial). Tap your device to connect.
- The device name always starts with Viking_.
- If your device is not listed, make sure it is powered on and within a few metres, then wait a moment for the scan to refresh.
- Skip this step lets you open the app without connecting — useful if you only want to review or send saved reports.
Good to know The app version is shown at the bottom of this screen.
The live screen
Once connected, the live screen shows real-time information straight from the charging station. This is where you test and troubleshoot.
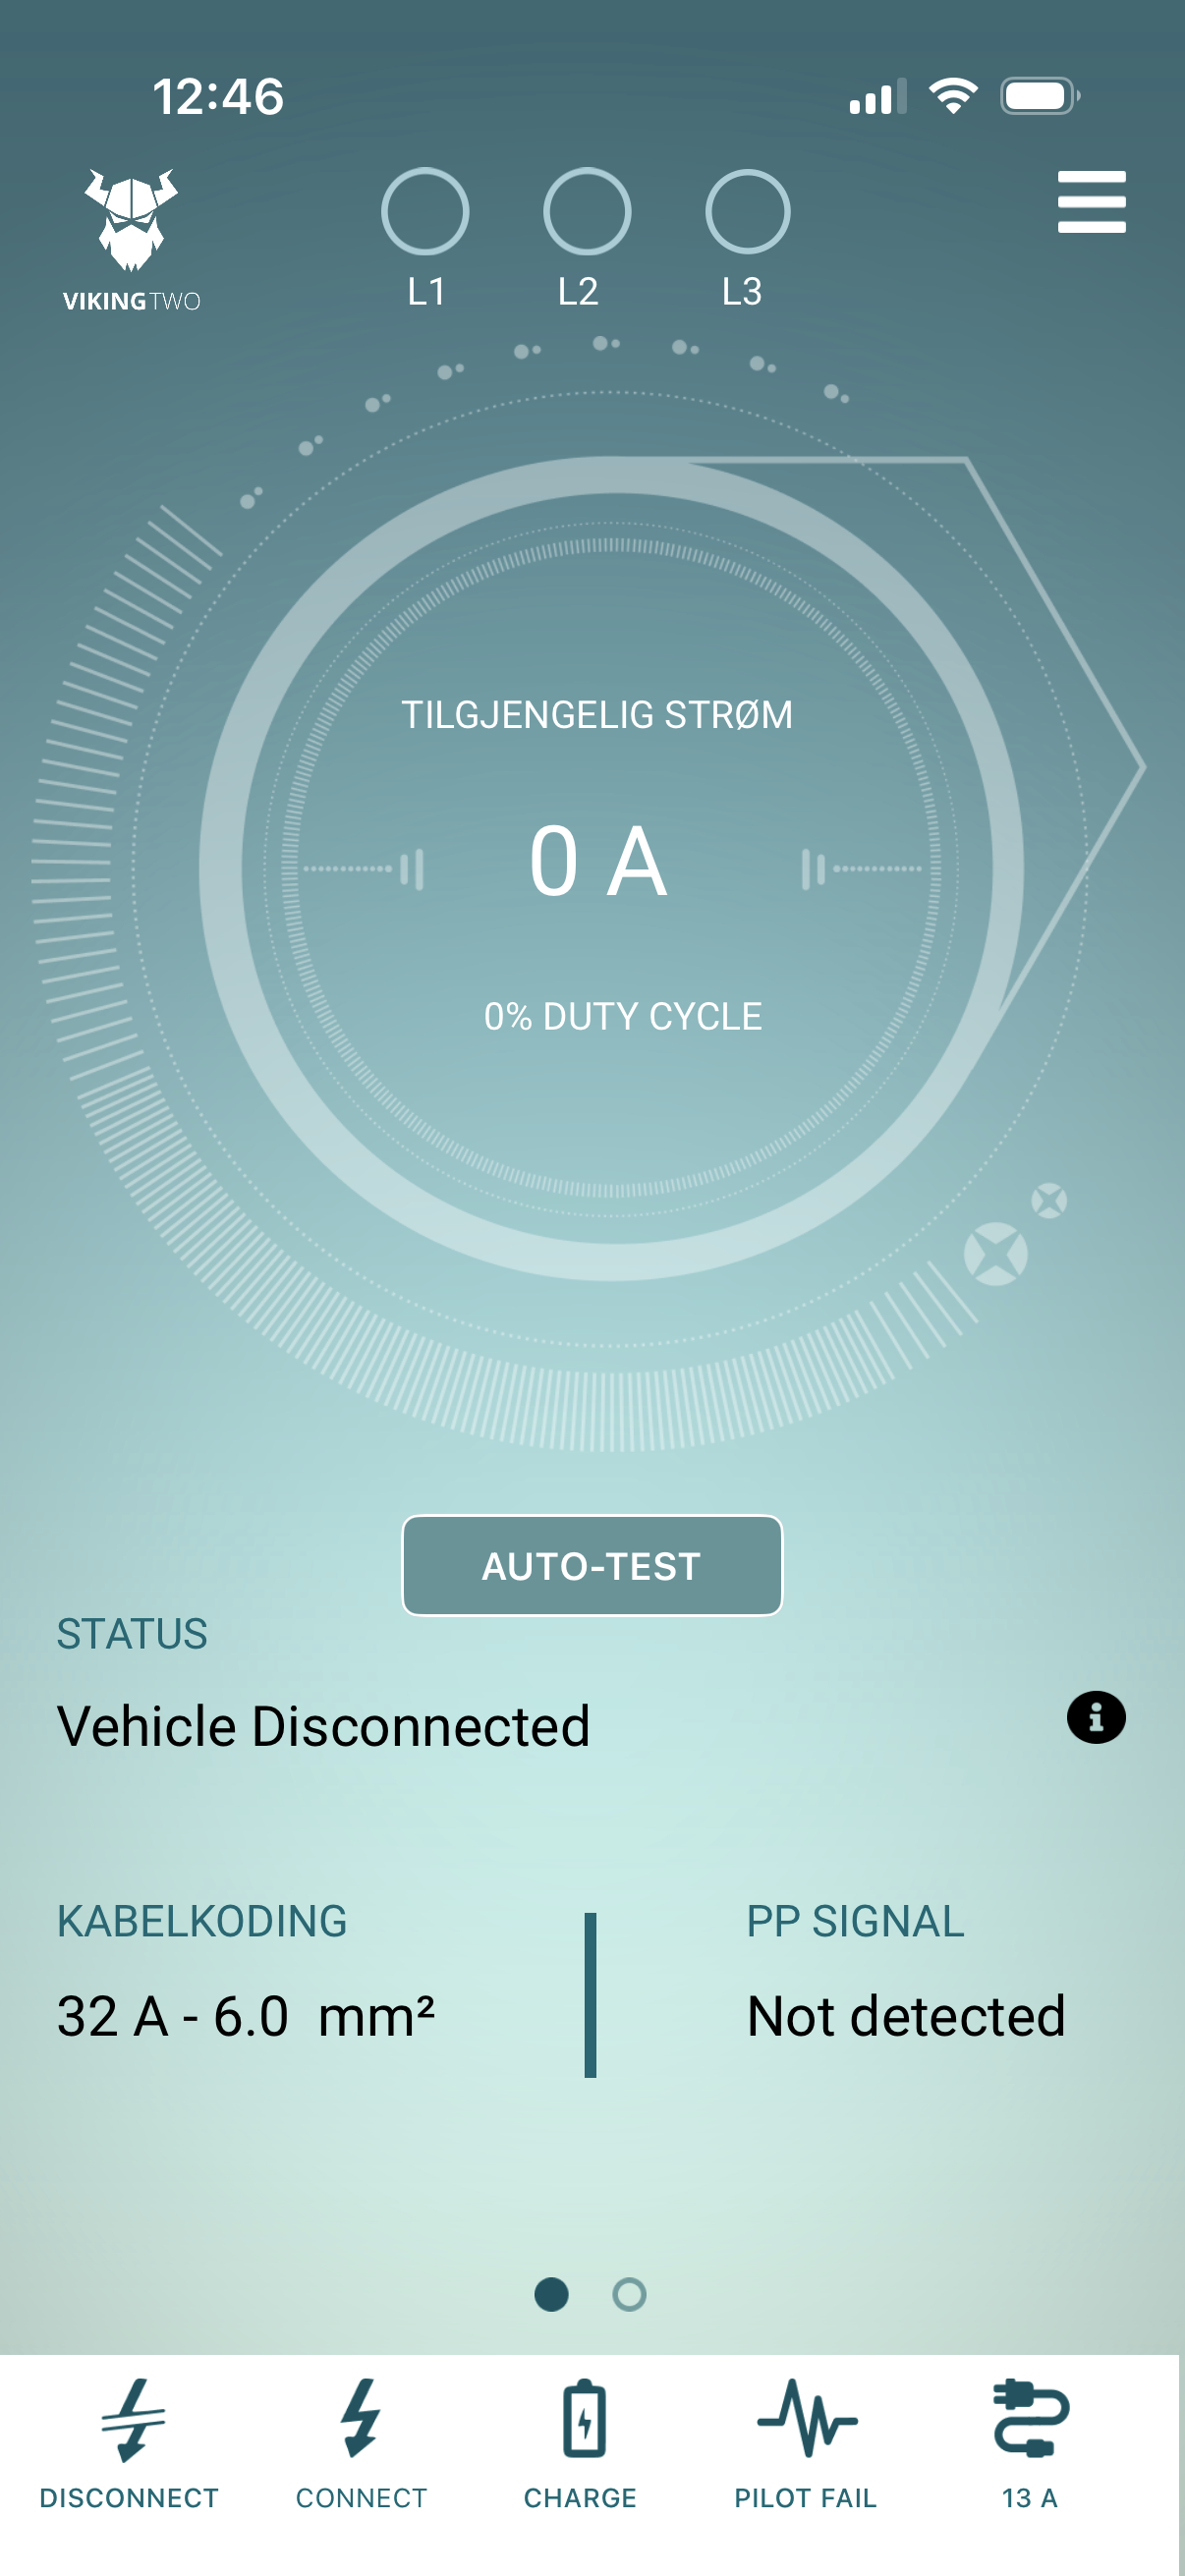
What you see
Everything updates live while the device is plugged into the station:
L1 · L2 · L3
Phase indicators. A filled circle means that phase is present. This tells you whether the station is single-phase (L1) or three-phase (L1–L3).
Available current
The maximum current the station is offering the car, decoded from the Control Pilot signal — shown together with the duty cycle (%).
Status
The current charging state in plain language, e.g. Vehicle Disconnected, Vehicle Connected or Charging. Tap the ⓘ icon for an explanation.
Cable coding
The cable's rated current and cross-section (e.g. 32 A – 6.0 mm²) read from the plug's coding resistor.
PP signal
The Proximity Pilot signal — shows whether the cable/plug is detected by the station.
Bottom controls
Disconnect, Connect and Charge simulate the car's states. Pilot Fail injects a fault, and the last button switches the simulated cable code.
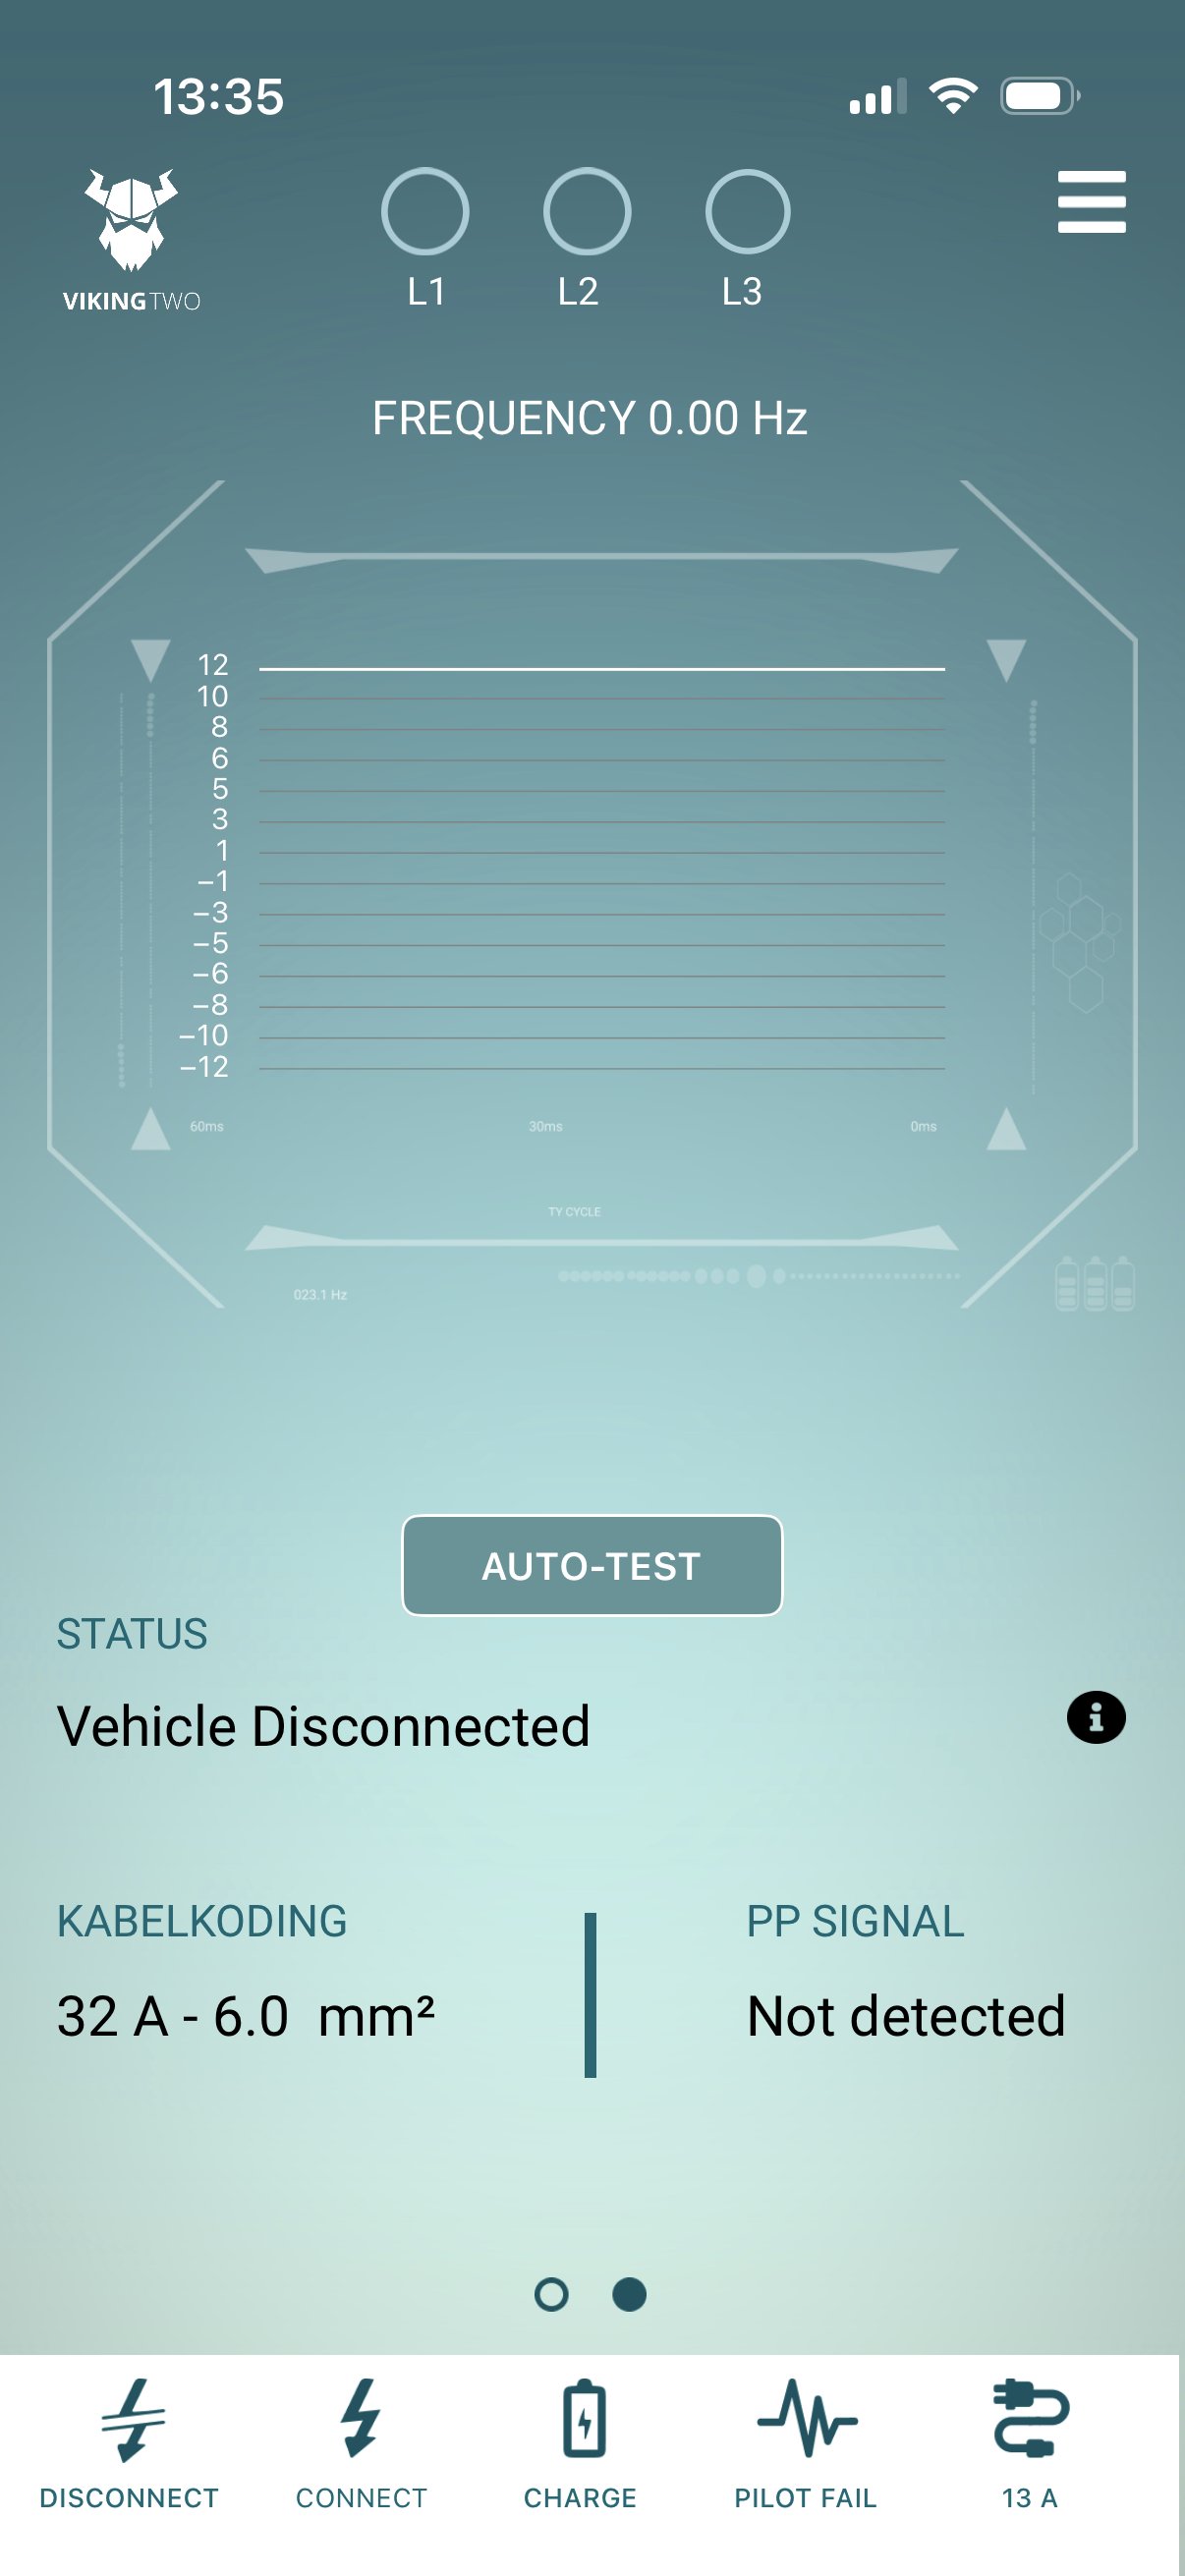
Swipe for the pilot signal graph
Swipe left on the live screen to see the Control Pilot (CP) waveform — a live oscilloscope-style graph of the ±12 V pilot signal and its frequency.
Use it to confirm the station is producing a clean ~1 kHz PWM signal. A distorted shape or an unusual frequency points to a pilot problem.
Tip The small dots below the graph show which page you are on — swipe back to return to the current gauge.
Auto-Test
The AUTO-TEST button runs a guided function test for you — no need to press each control by hand.
How it works
Tap AUTO-TEST and the app automatically steps the simulated vehicle through the full sequence:
- Disconnected → Connected → Charging, just like a real charging session.
- It watches how quickly the station's contactor closes and which phases go live.
- It checks the available current the station offers.
- When done it returns the station to a safe (disconnected) state.
You then get a clear PASS or CHECK INSTALLATION result, with the measured current, number of phases and the time until the phases went live.
Menu & language
Tap the menu icon (☰) in the top-right corner to open the side menu.
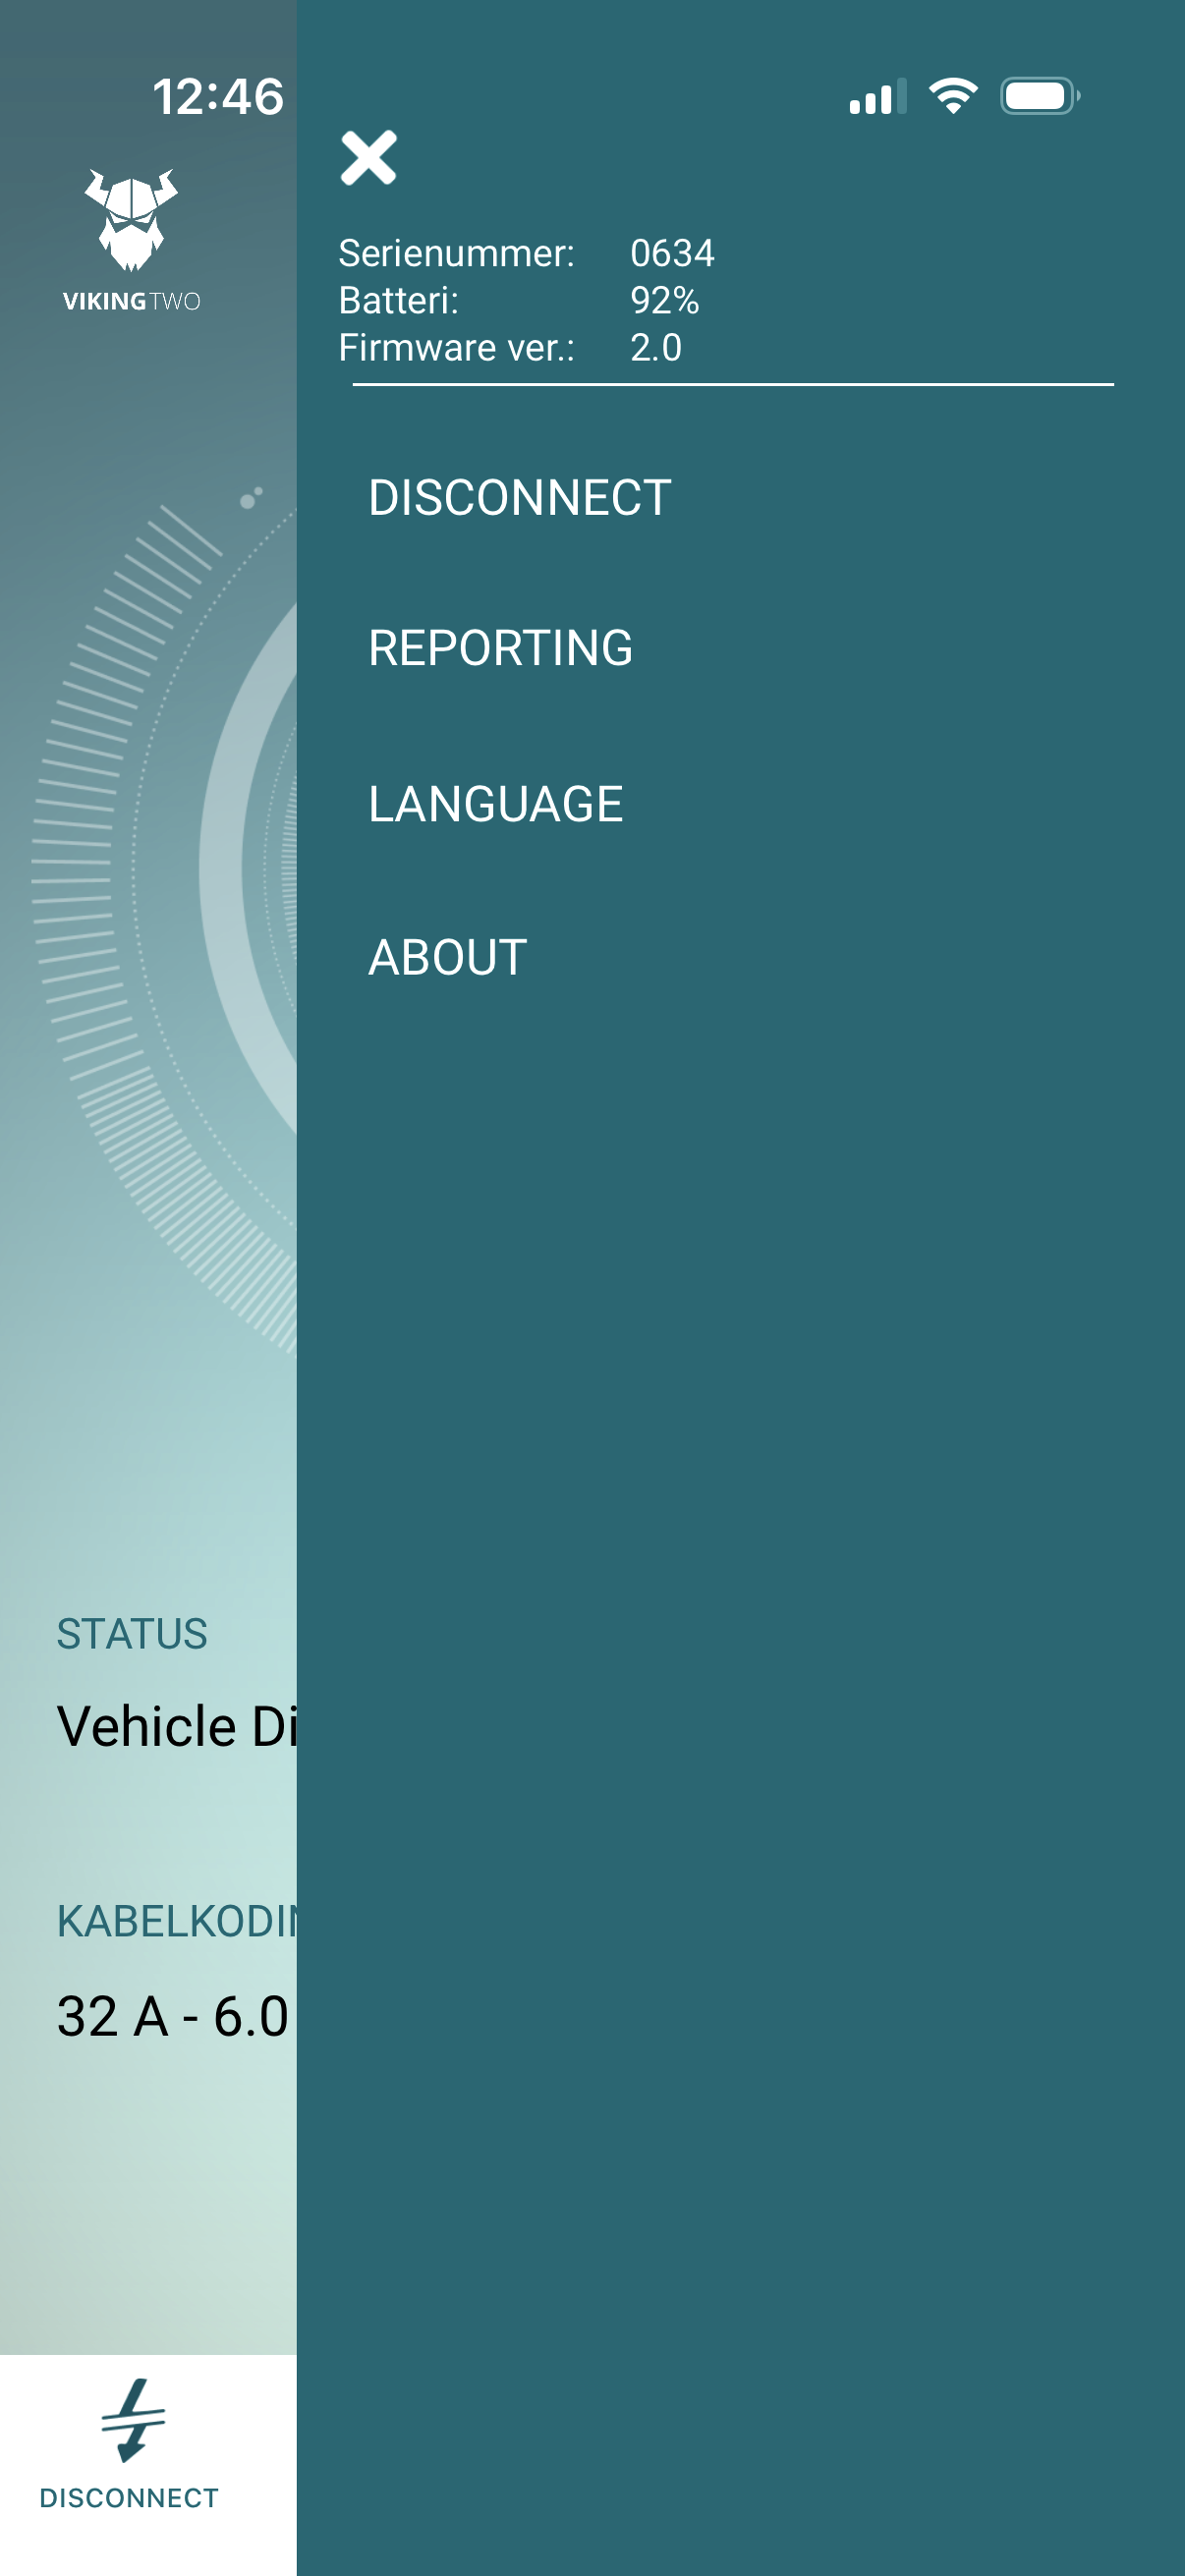
What's in the menu
The top of the menu shows details about the connected device:
- Serial number — identifies your Viking Two device.
- Battery — the device's remaining charge.
- Firmware version — the software running on the device.
Below that you'll find:
- Disconnect — end the Bluetooth connection.
- Reporting — start or continue an inspection report.
- Language — change the app language.
- About — app and legal information.
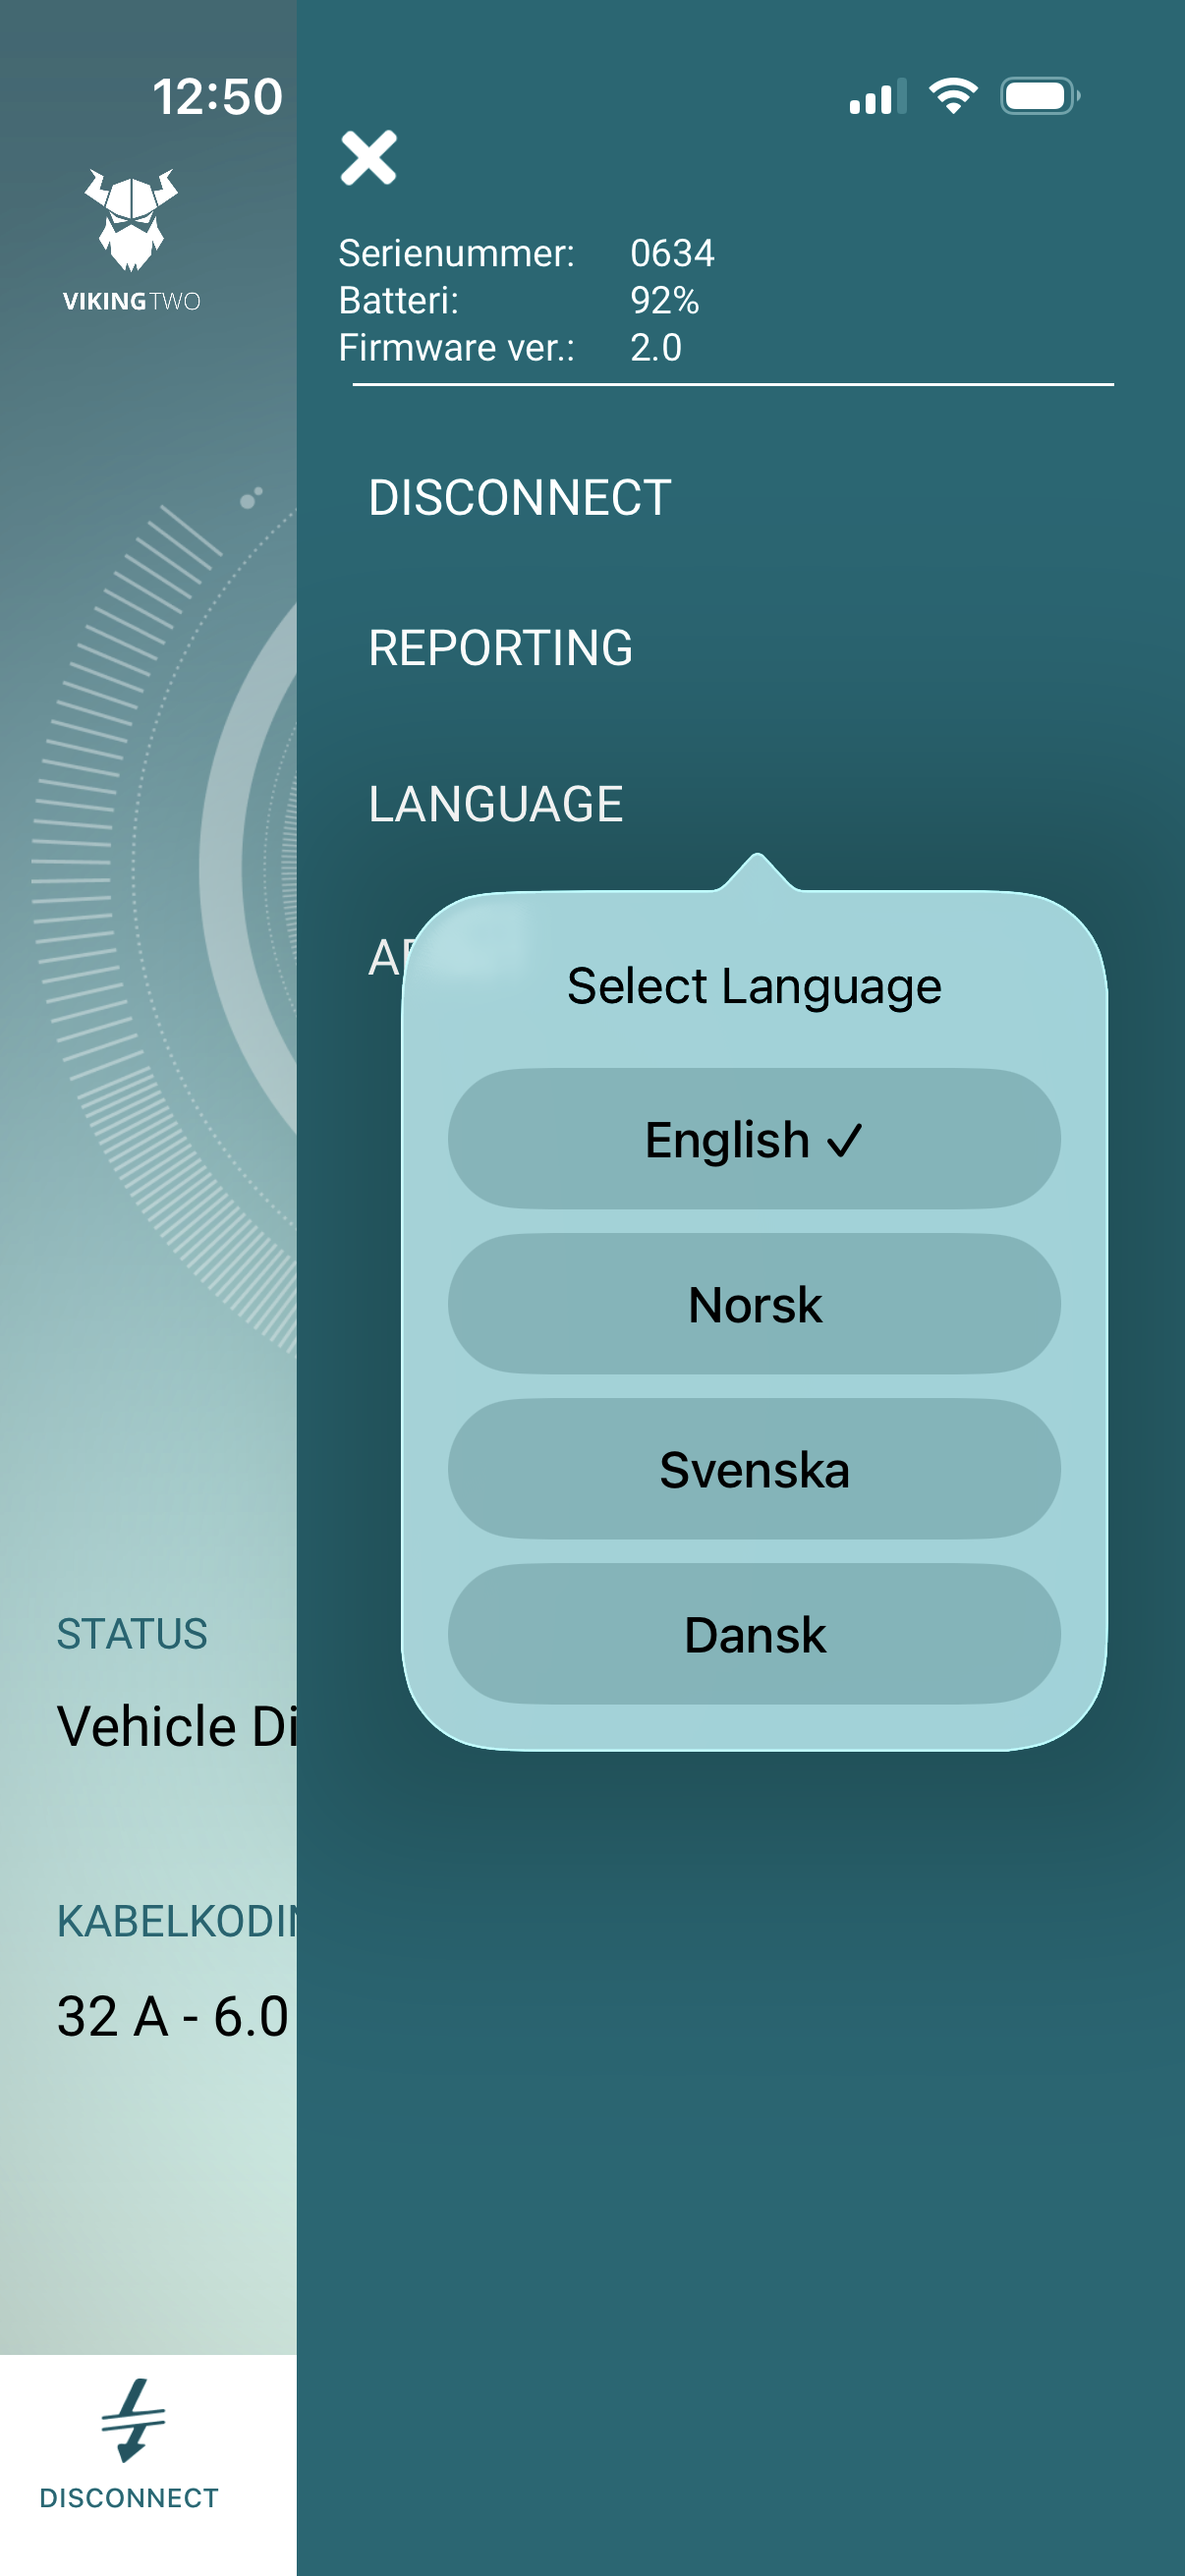
Changing the language
Choose Language from the menu and pick your language — the app supports English, Norwegian, Swedish, Danish and more. The whole app, and the reports you send, follow your choice.
Create an inspection report
The reporting wizard walks you through seven simple steps and then emails a professional PDF report to your customer and/or your own company.
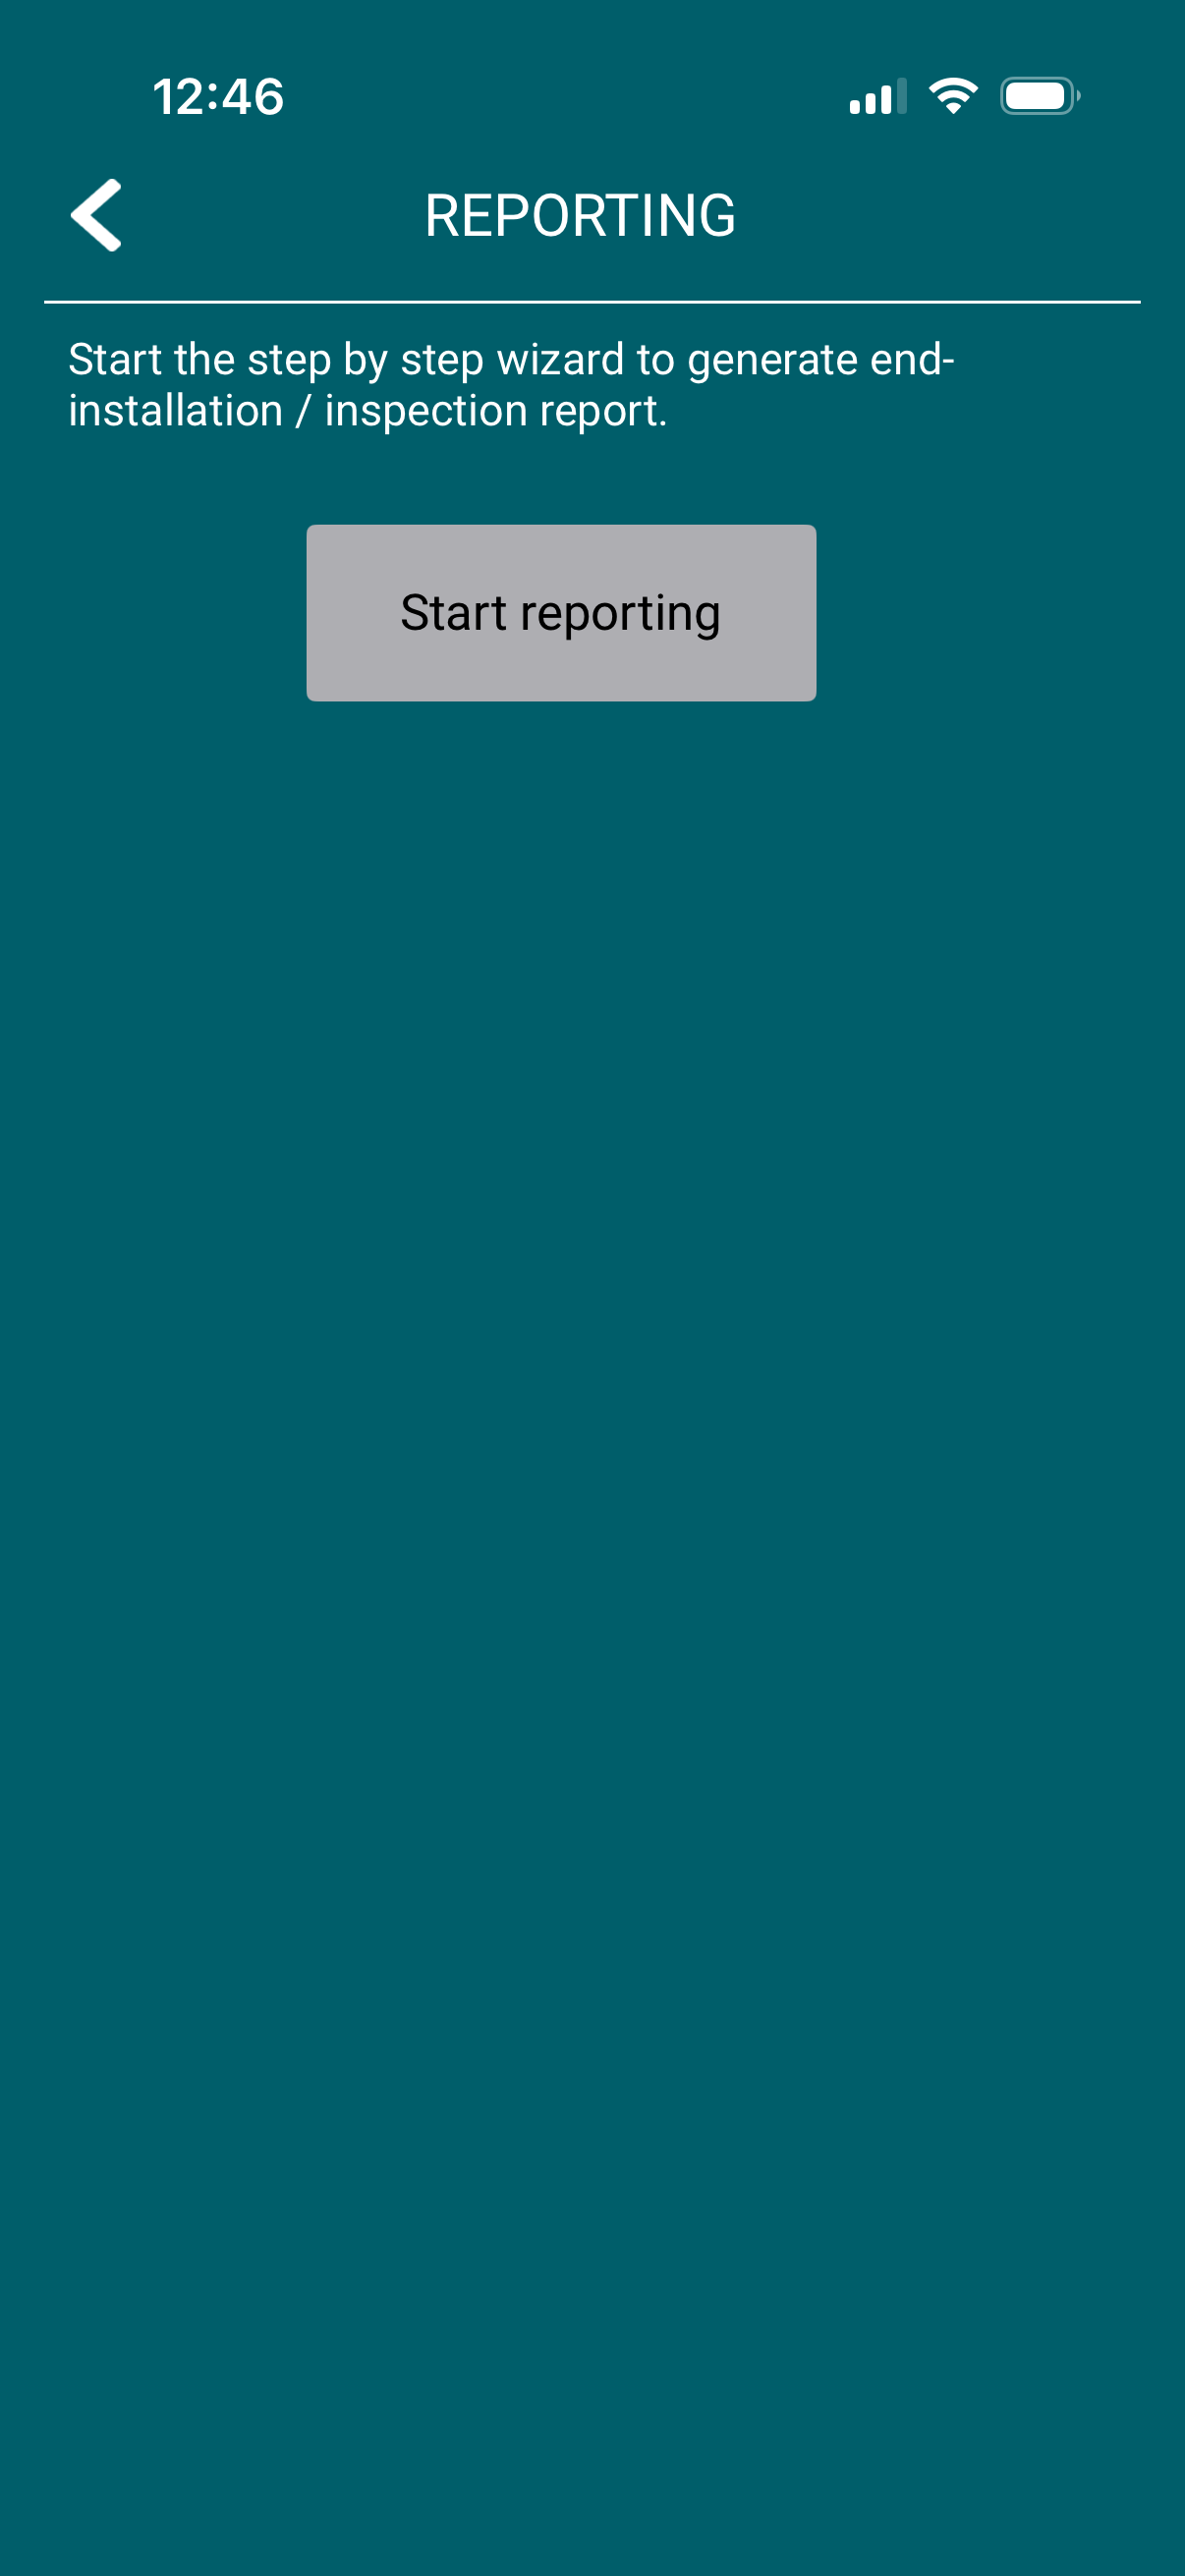
Start the wizard
Open Reporting from the menu and tap Start reporting. You can move Next and Previous between steps at any time — your progress is saved automatically as a draft.
Tip You don't need to be connected to a device to fill in or finish a saved report.
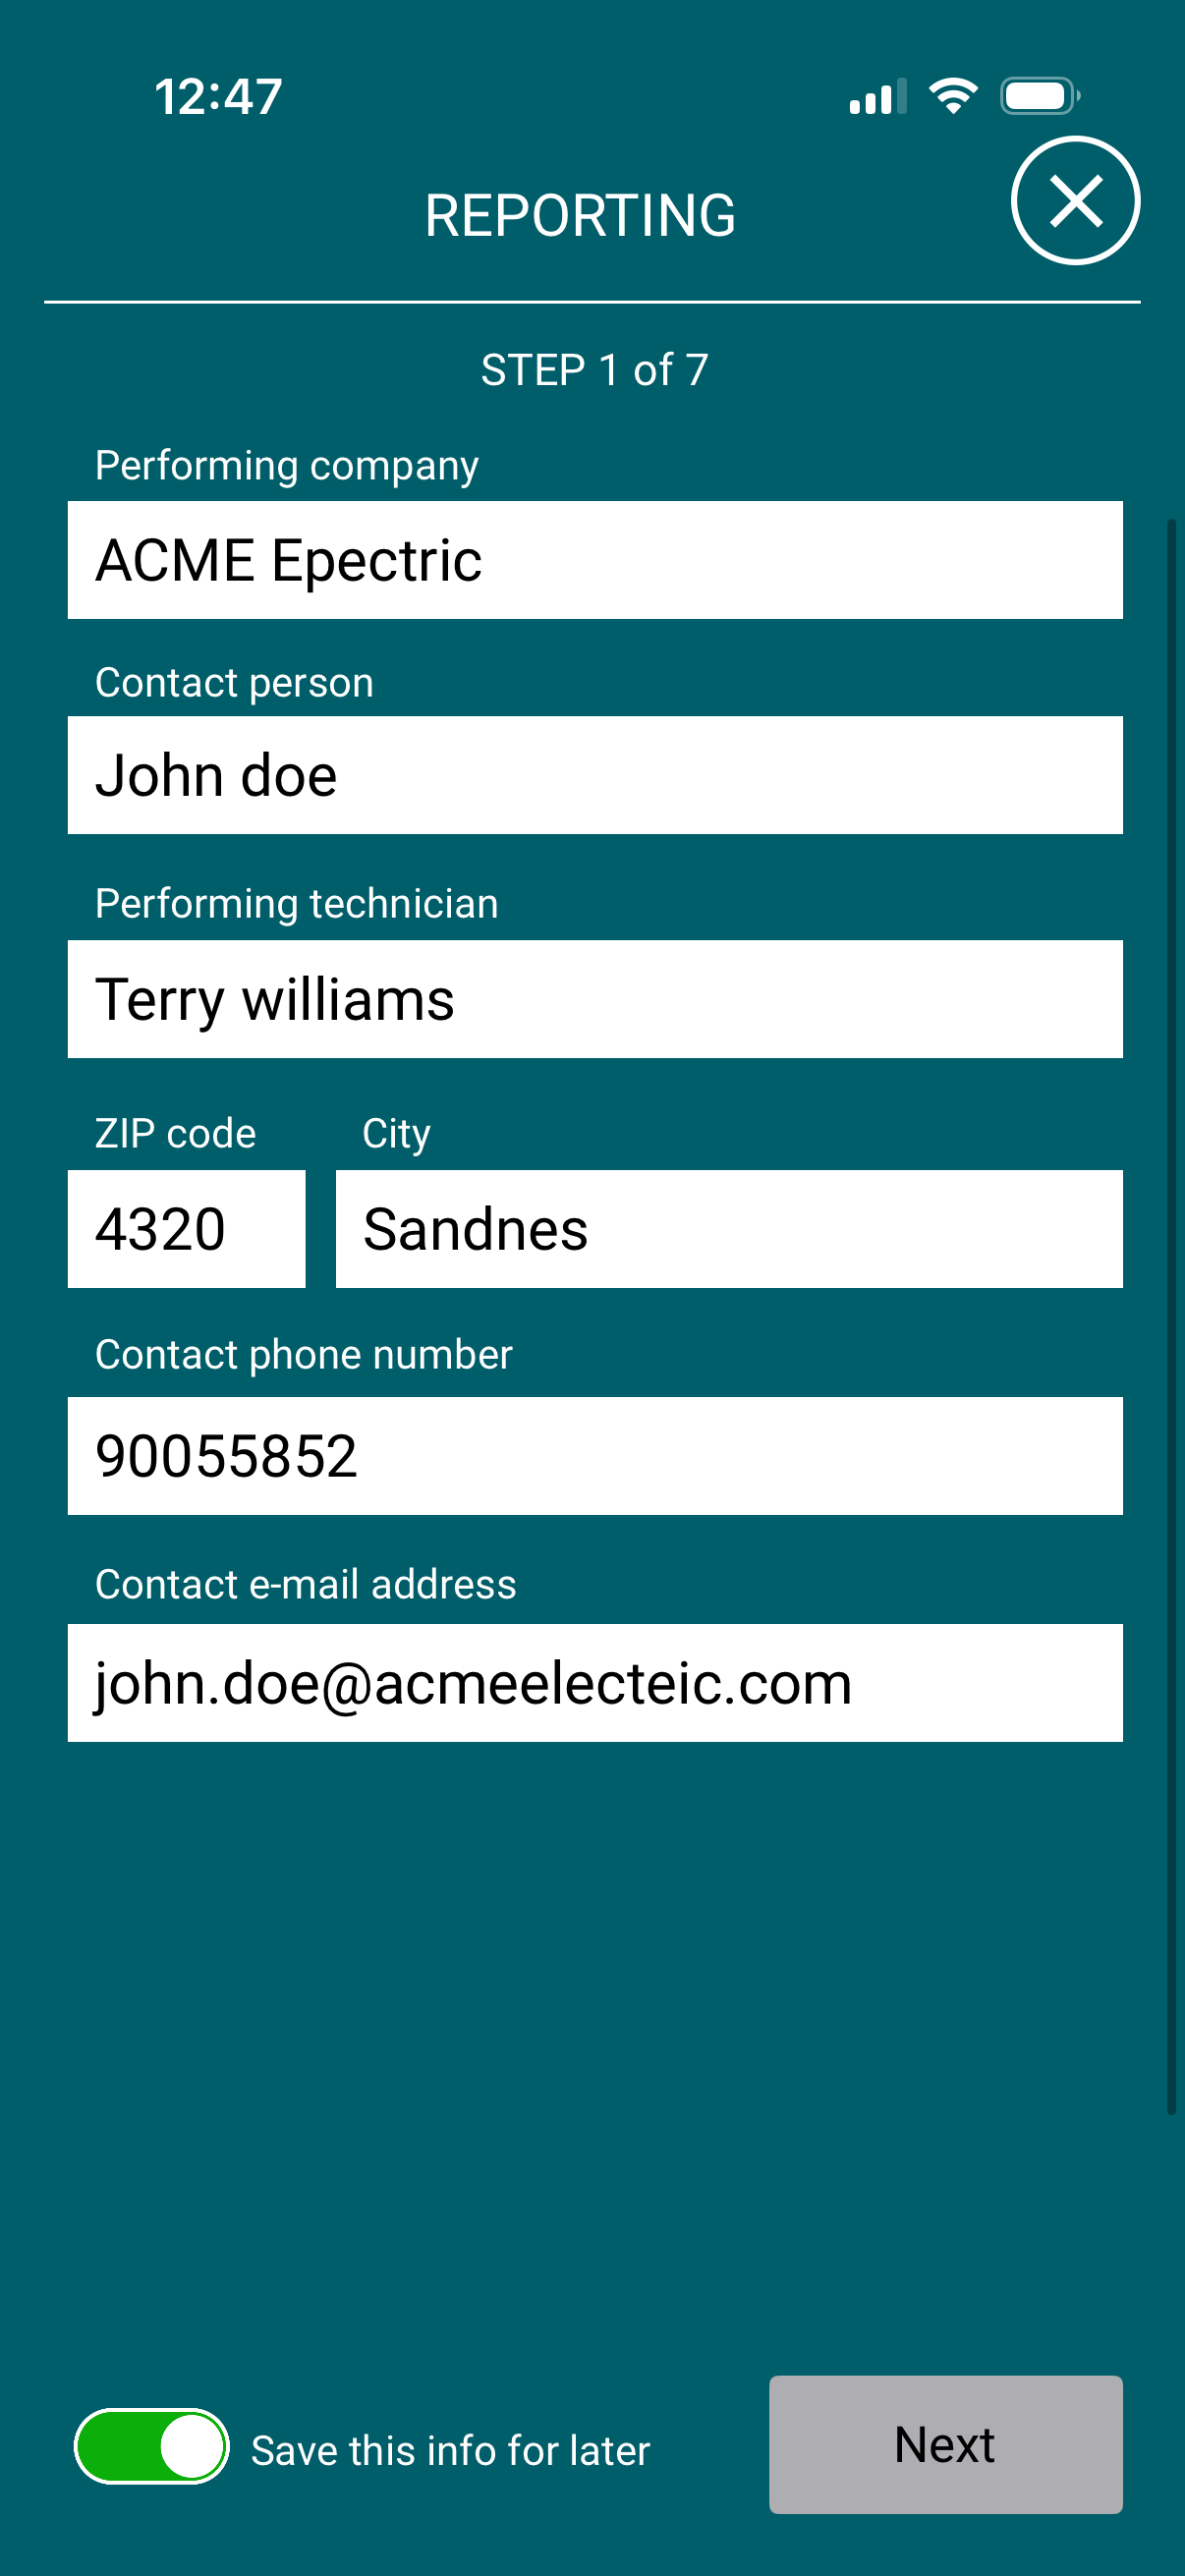
1 Performing company
Enter your company and technician details: company name, contact person, technician, ZIP, city, phone and email.
Time-saver Turn on Save this info for later and these fields fill in automatically on your next report.
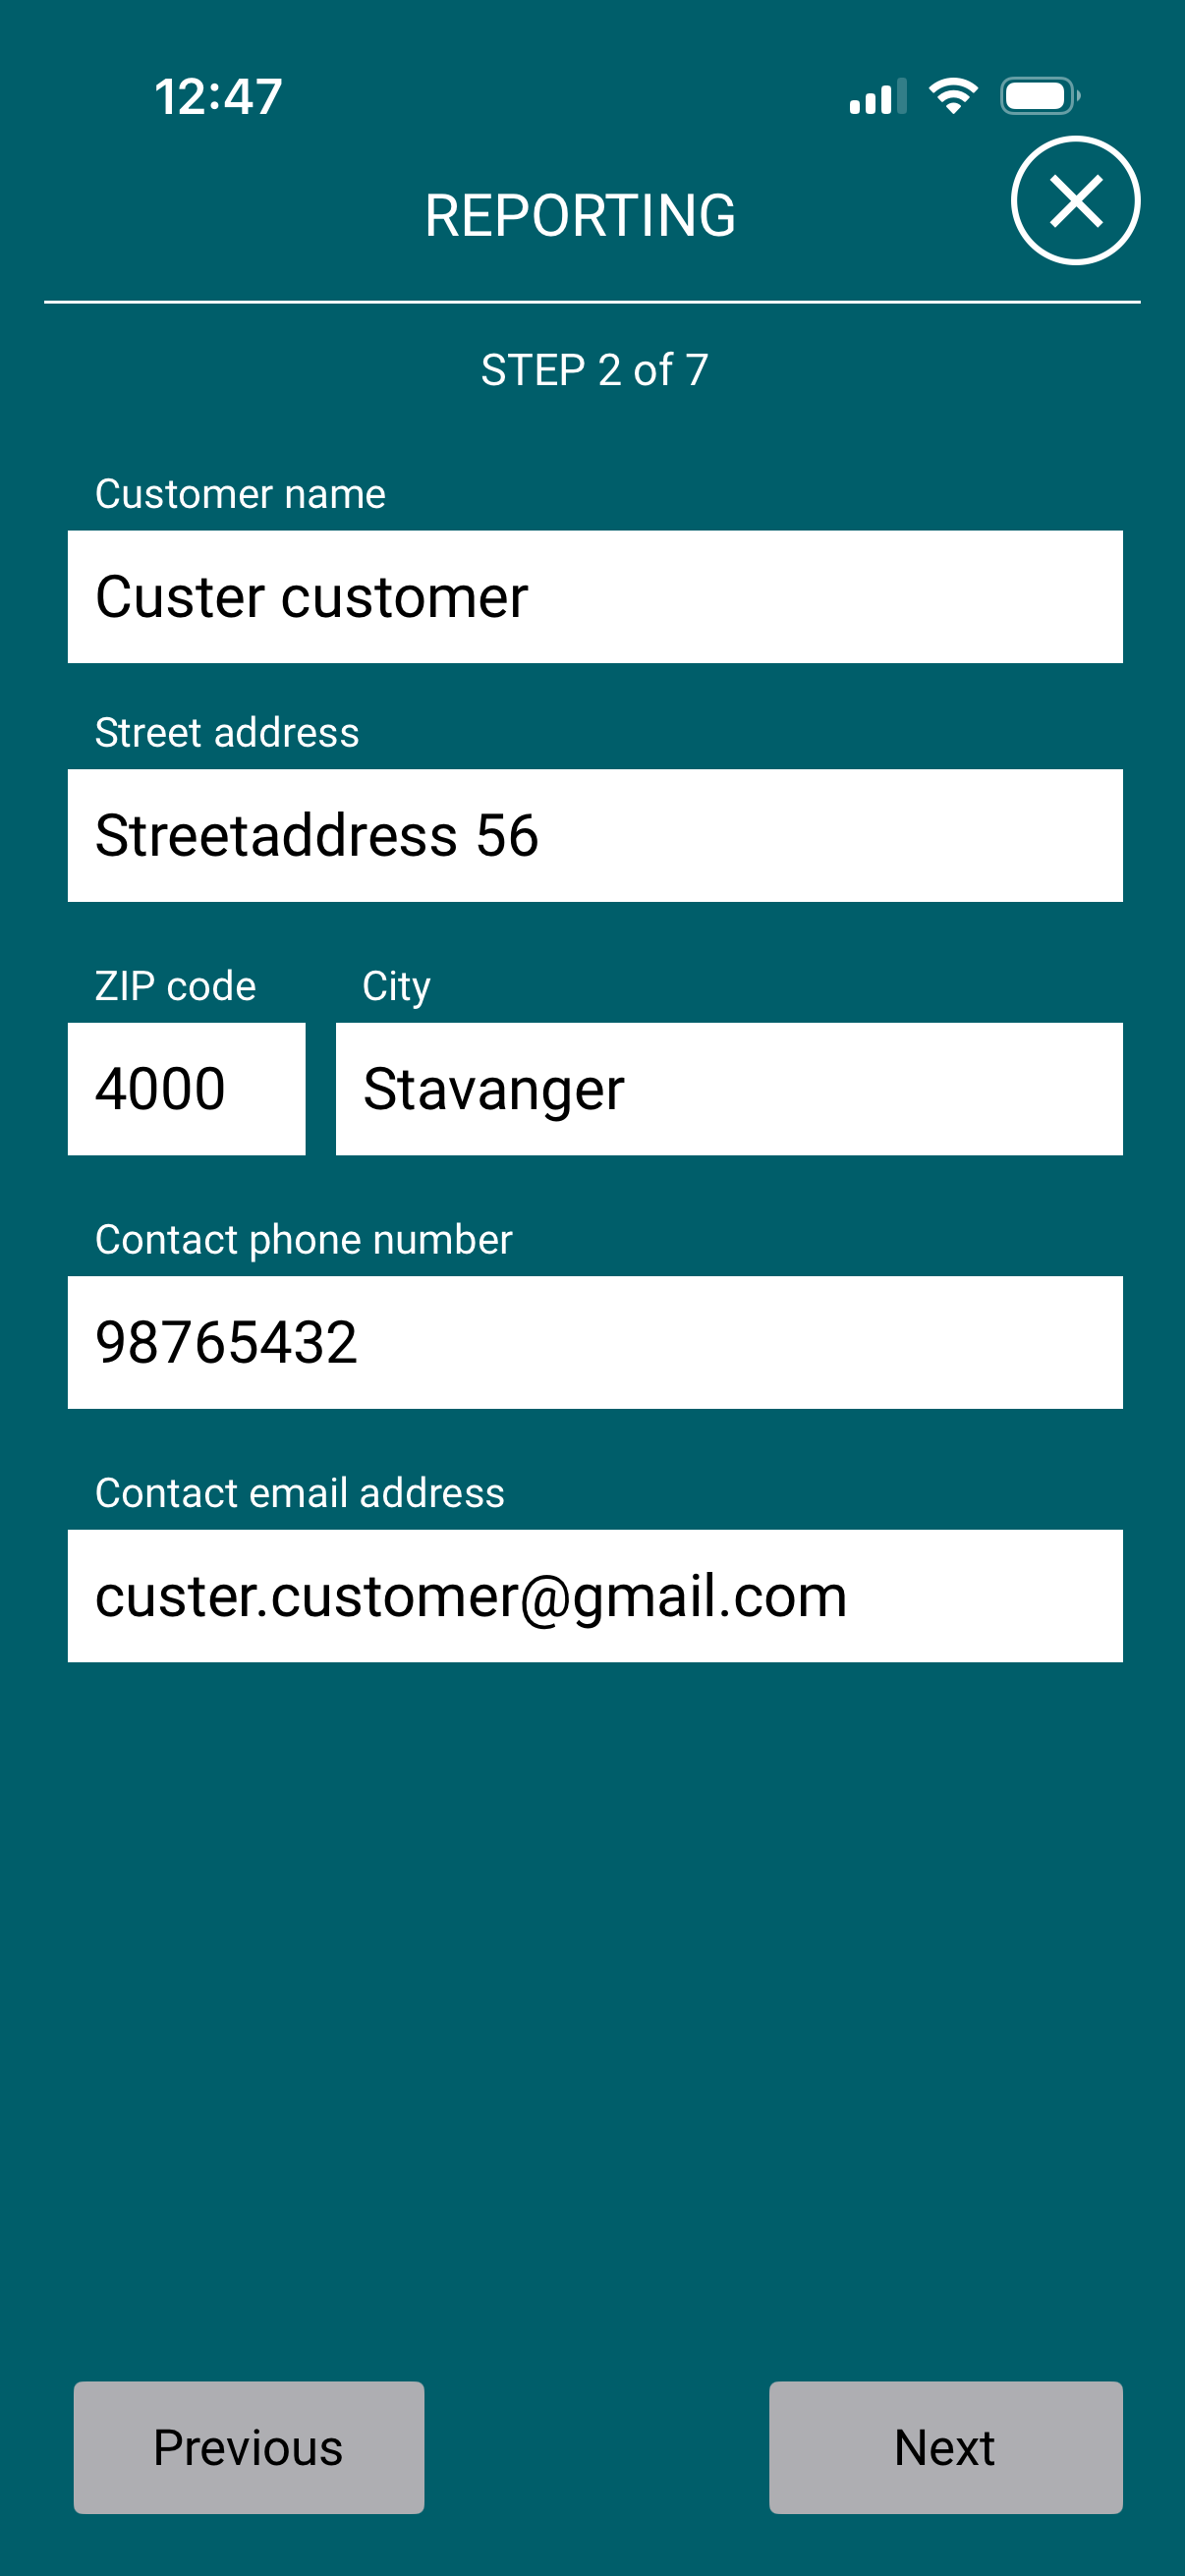
2 Customer
Enter the customer's details — name, address, ZIP, city, phone and email. The email address here is used if you choose to send the finished report to the customer.
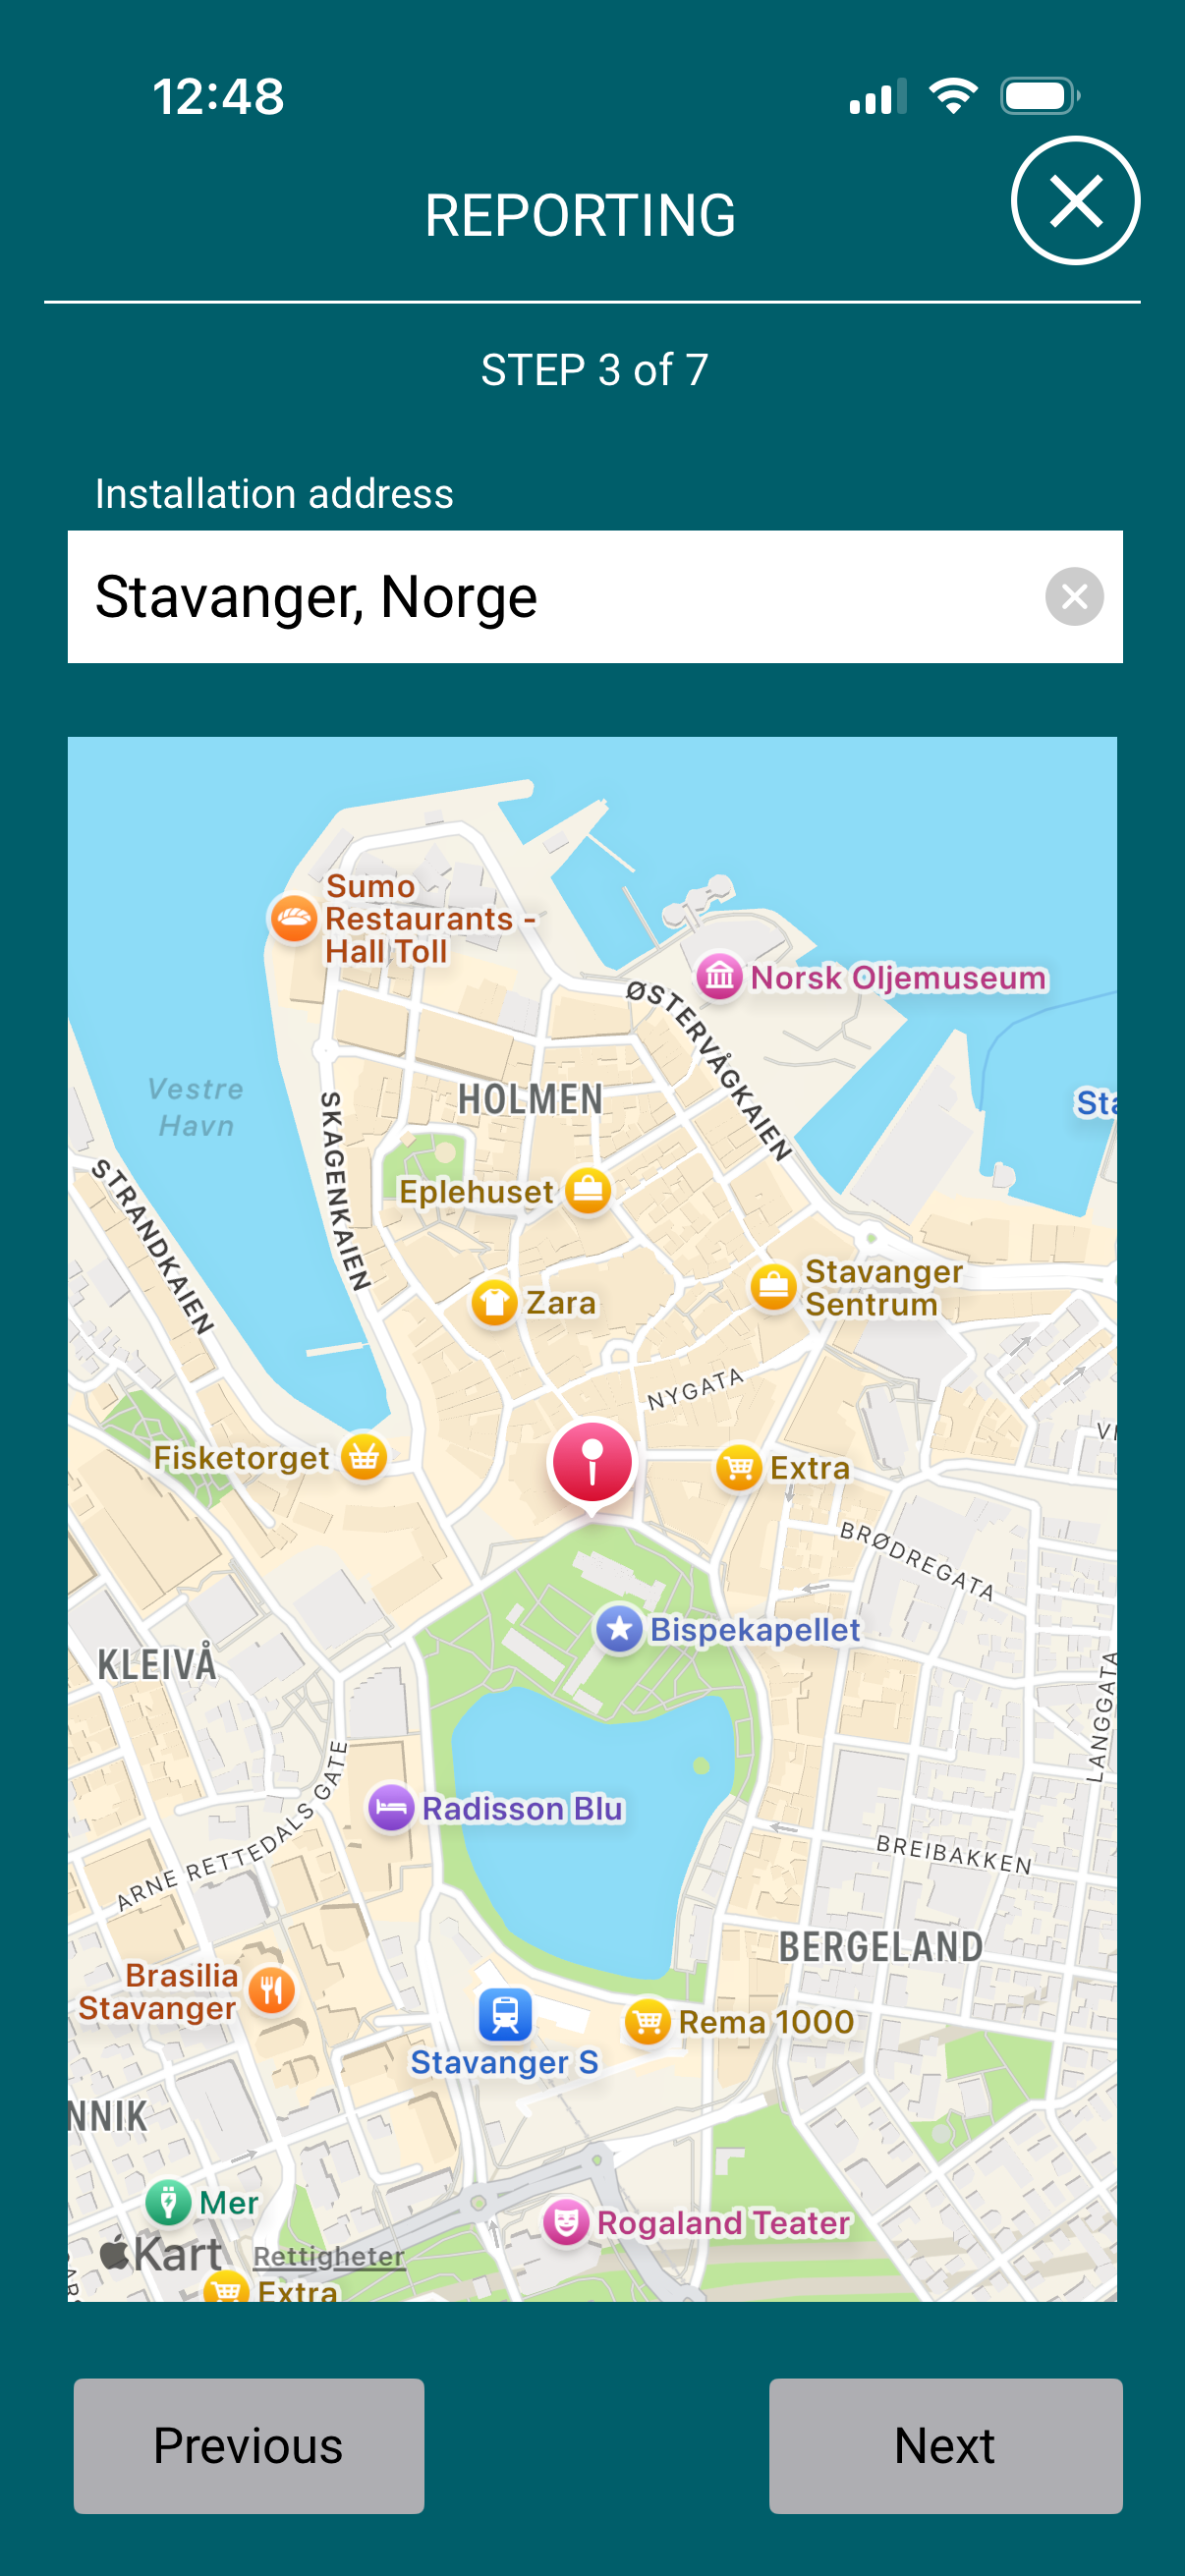
3 Installation address
Start typing the address and pick it from the suggestions — a map pin confirms the exact location of the charging station. This is stored on the report so the site is clearly documented.
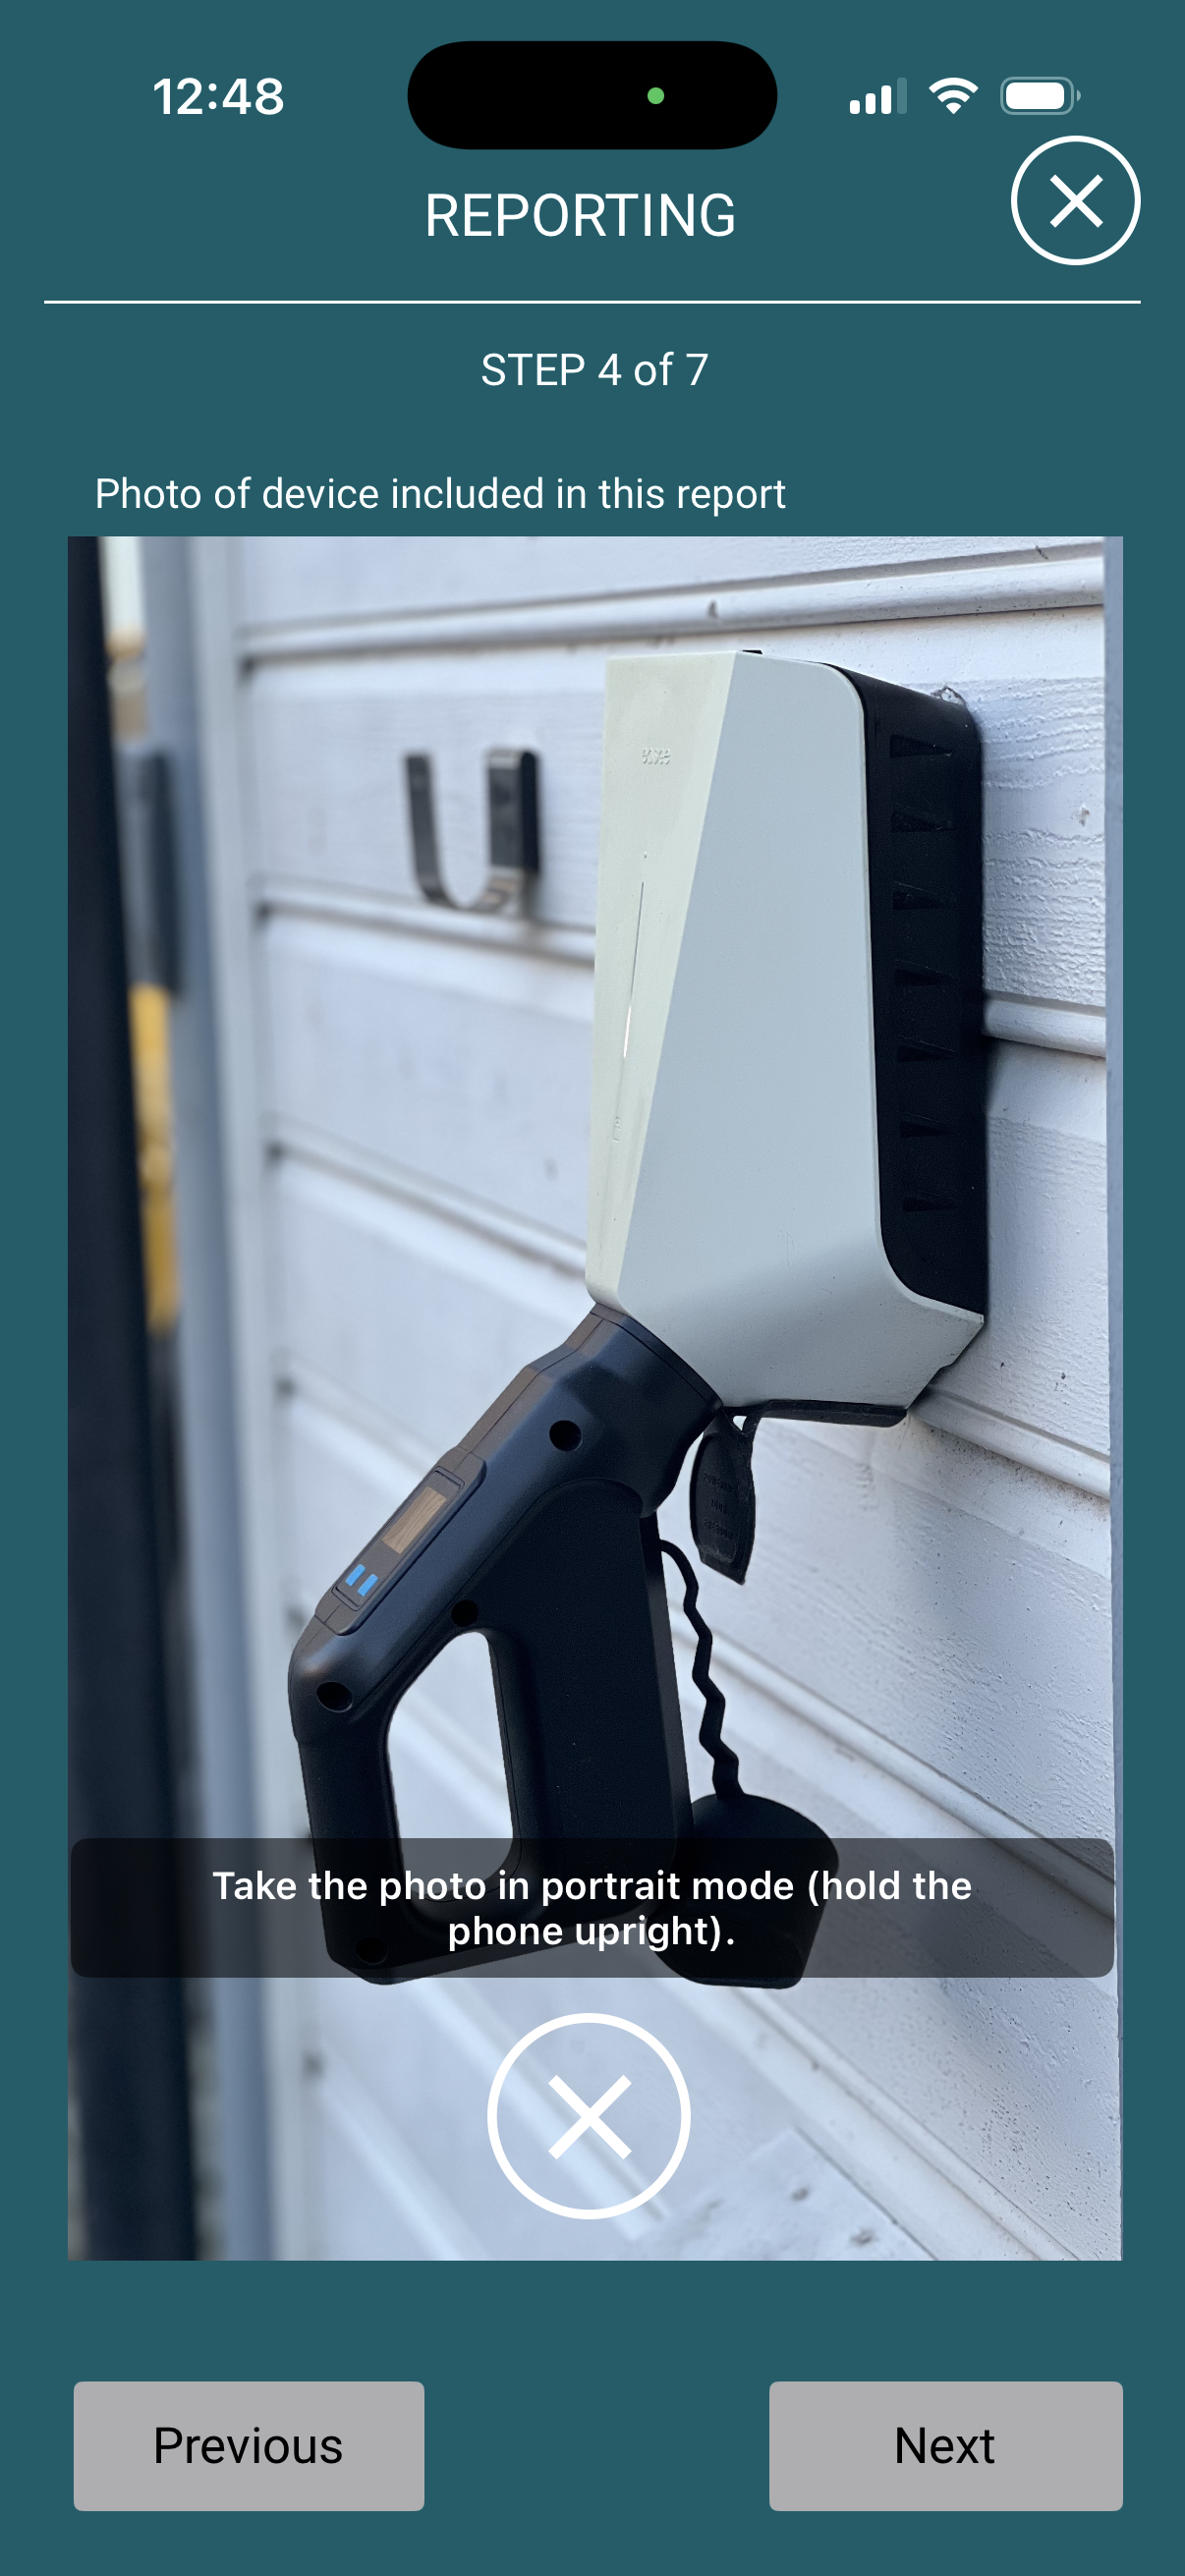
4 Photo
Take a photo of the charging station or installation, or pick one from your gallery. The photo is included in the PDF report.
Best photo Hold the phone upright (portrait) and make sure the unit and its rating plate are clearly visible.
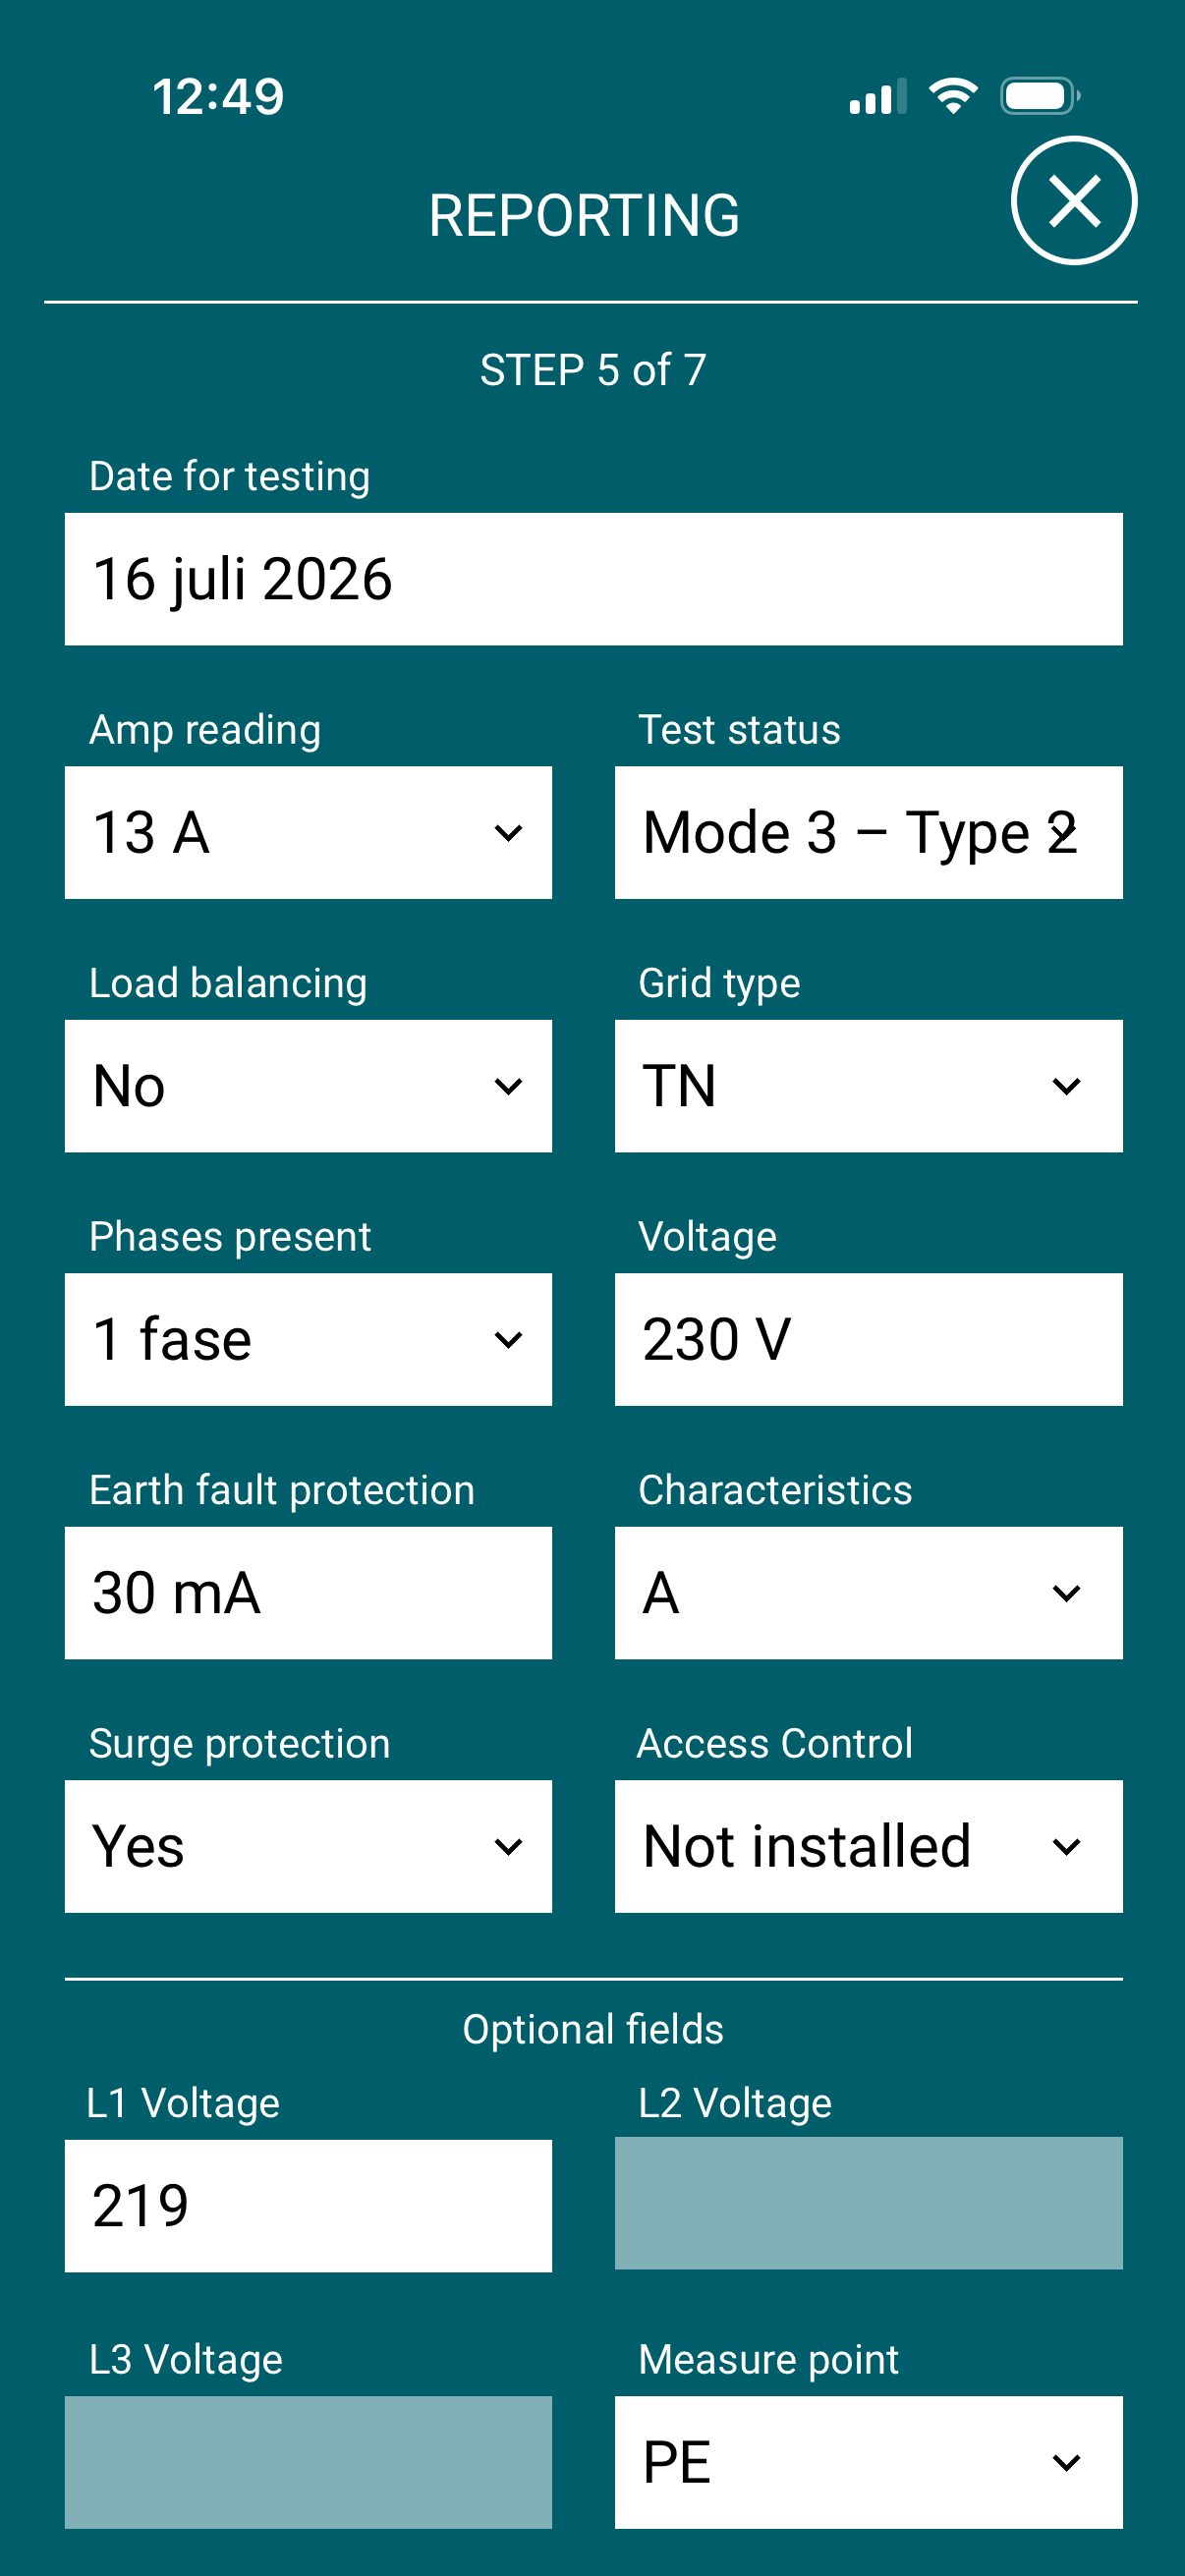
5 Measurements & settings
Record the test details for the installation:
- Test date, ampere reading and test standard (e.g. Mode 3 – Type 2).
- Load balancing, grid type (TN/IT/TT) and phases present.
- Voltage, earth-fault protection, characteristic, surge protection and access control.
- Optional per-phase voltages (L1/L2/L3) and the measure point.
Auto-fill The app pre-fills the ampere reading from the live test, and can suggest 3 phases when the device has detected them.
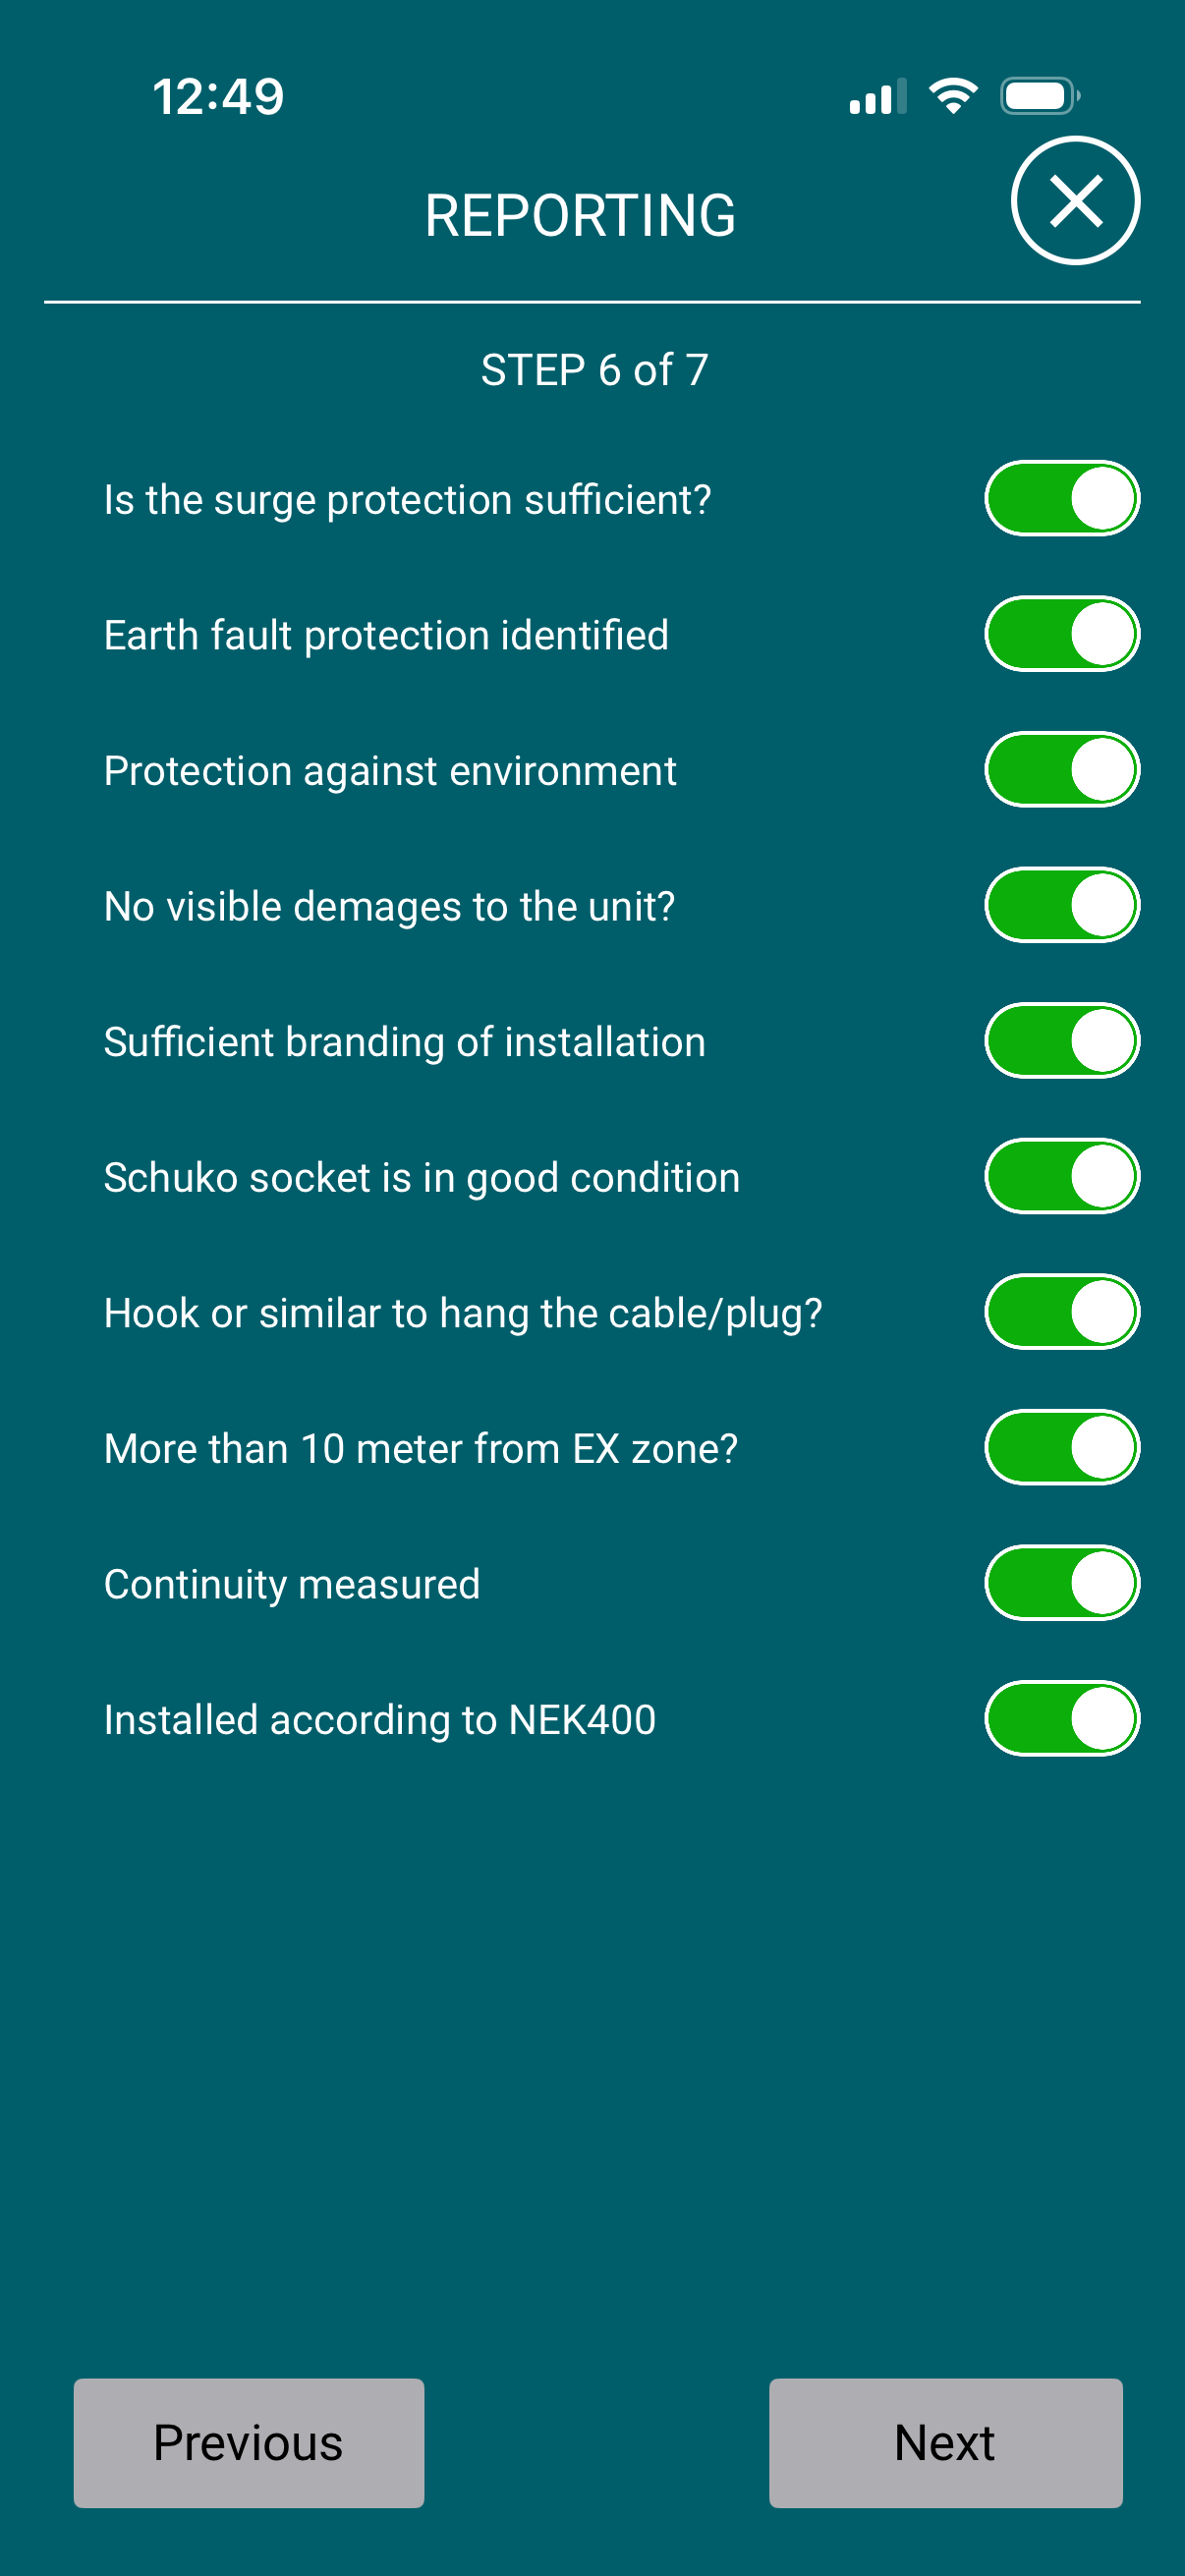
6 Inspection checklist
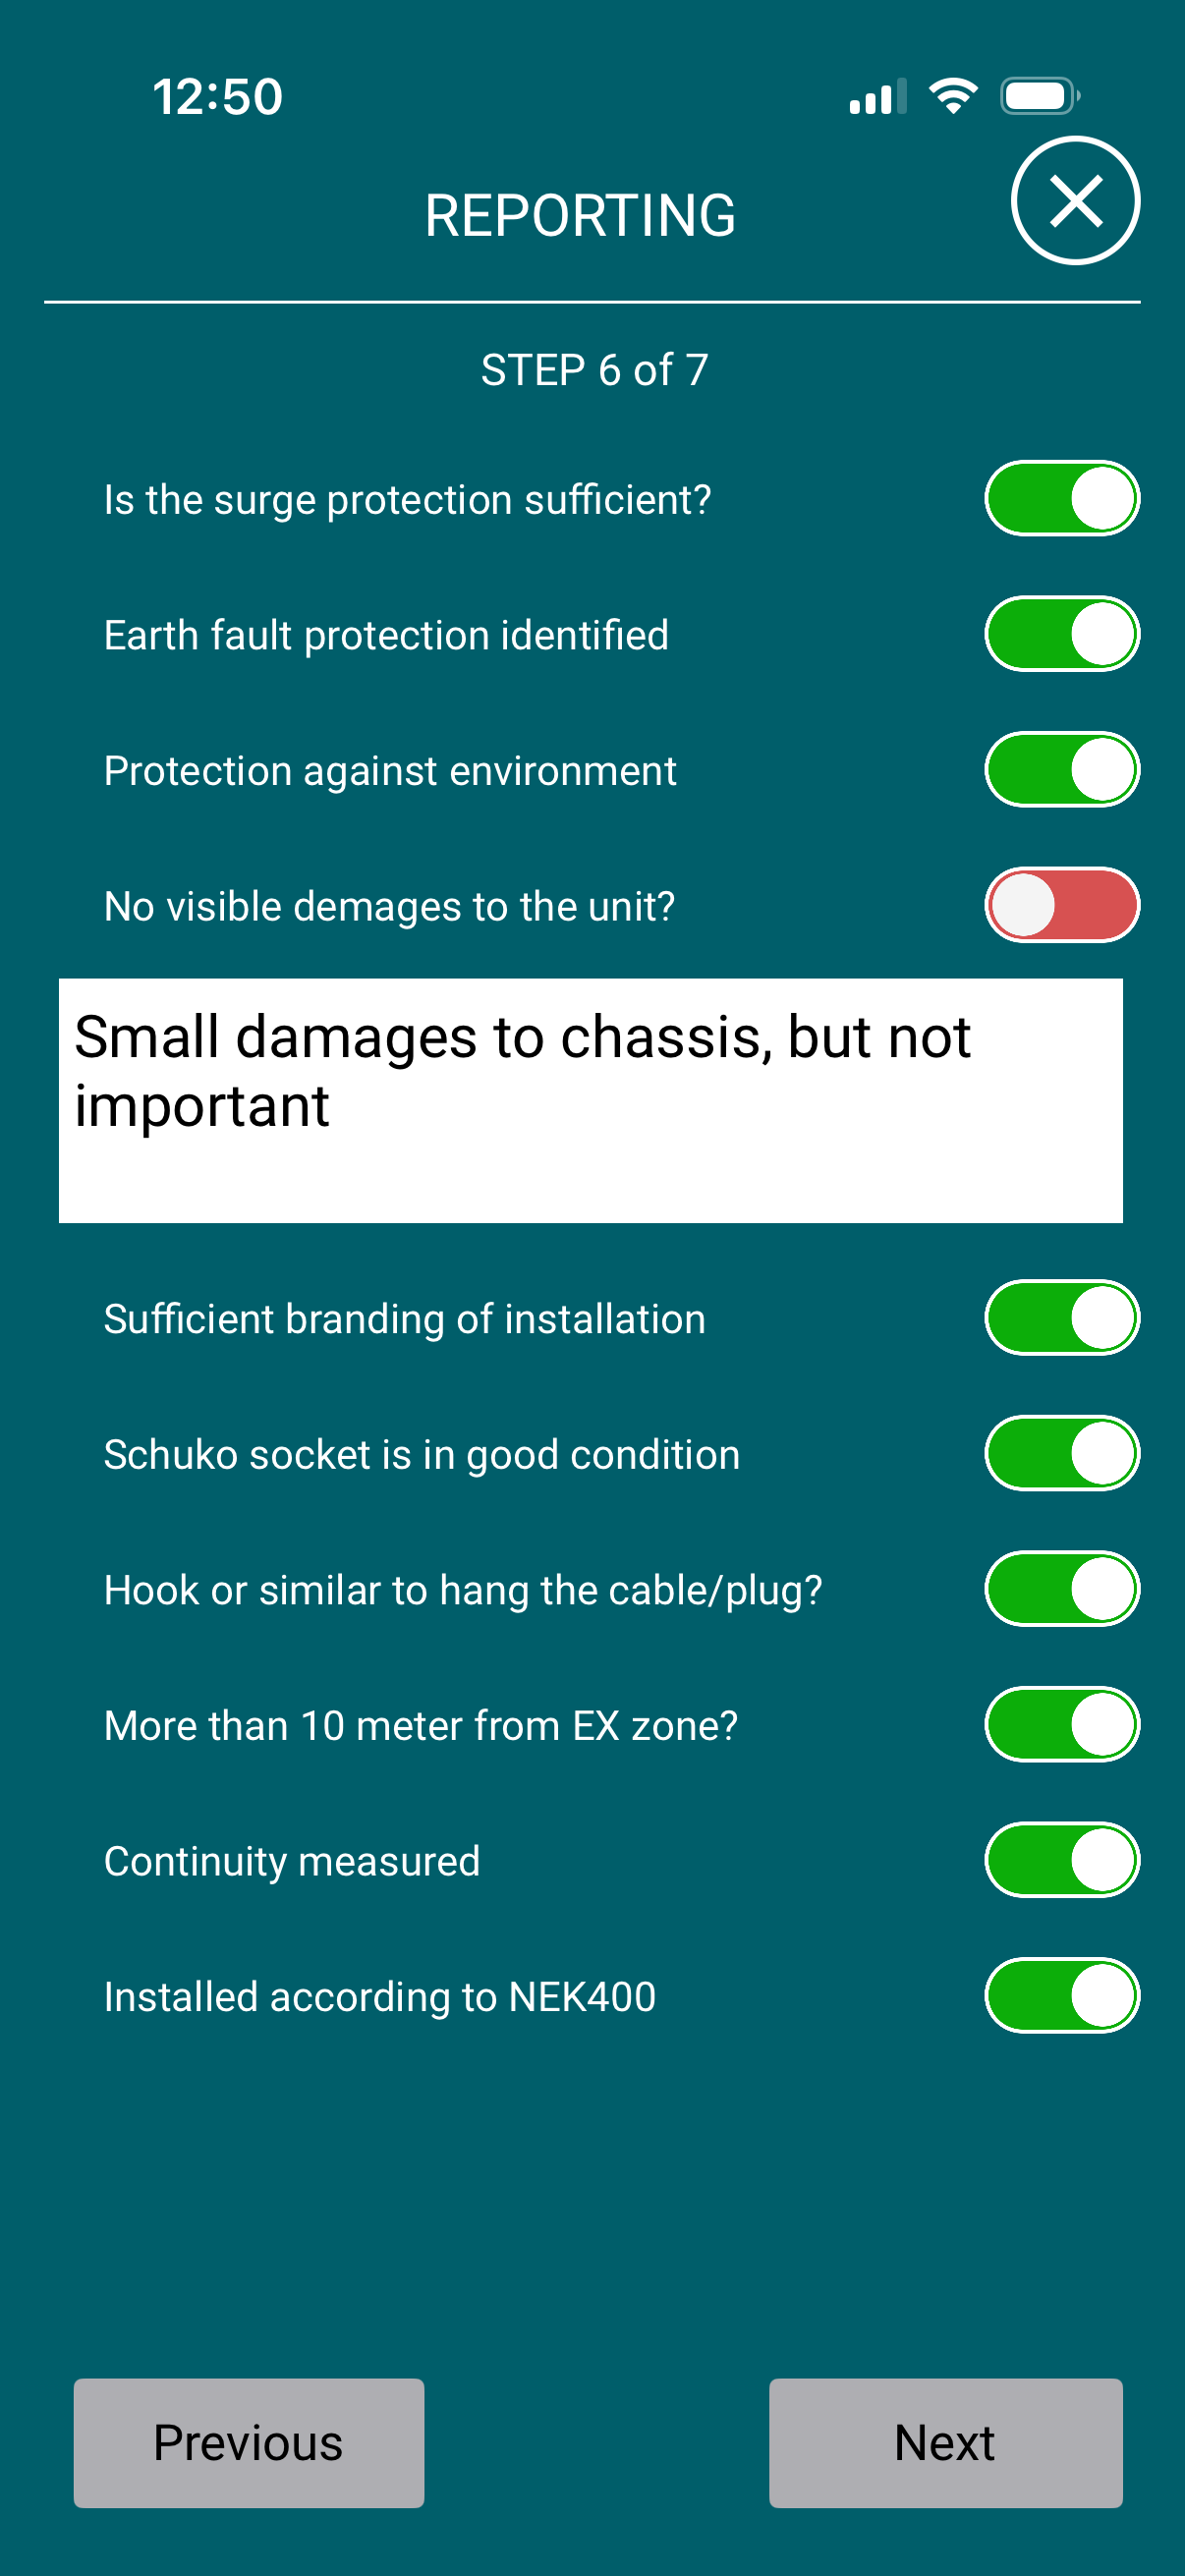
Work through the yes/no checklist covering the physical inspection — surge protection, earth-fault protection, protection against the environment, visible damage, labelling, socket condition, cable hook, distance from EX zones, continuity and NEK 400 compliance.
6 Noting a deviation
If something is not OK, switch that item off. A comment box appears where you describe the deviation (for example "Small damage to chassis, but not important"). All comments are included in the report so nothing is lost.
7 Send the report
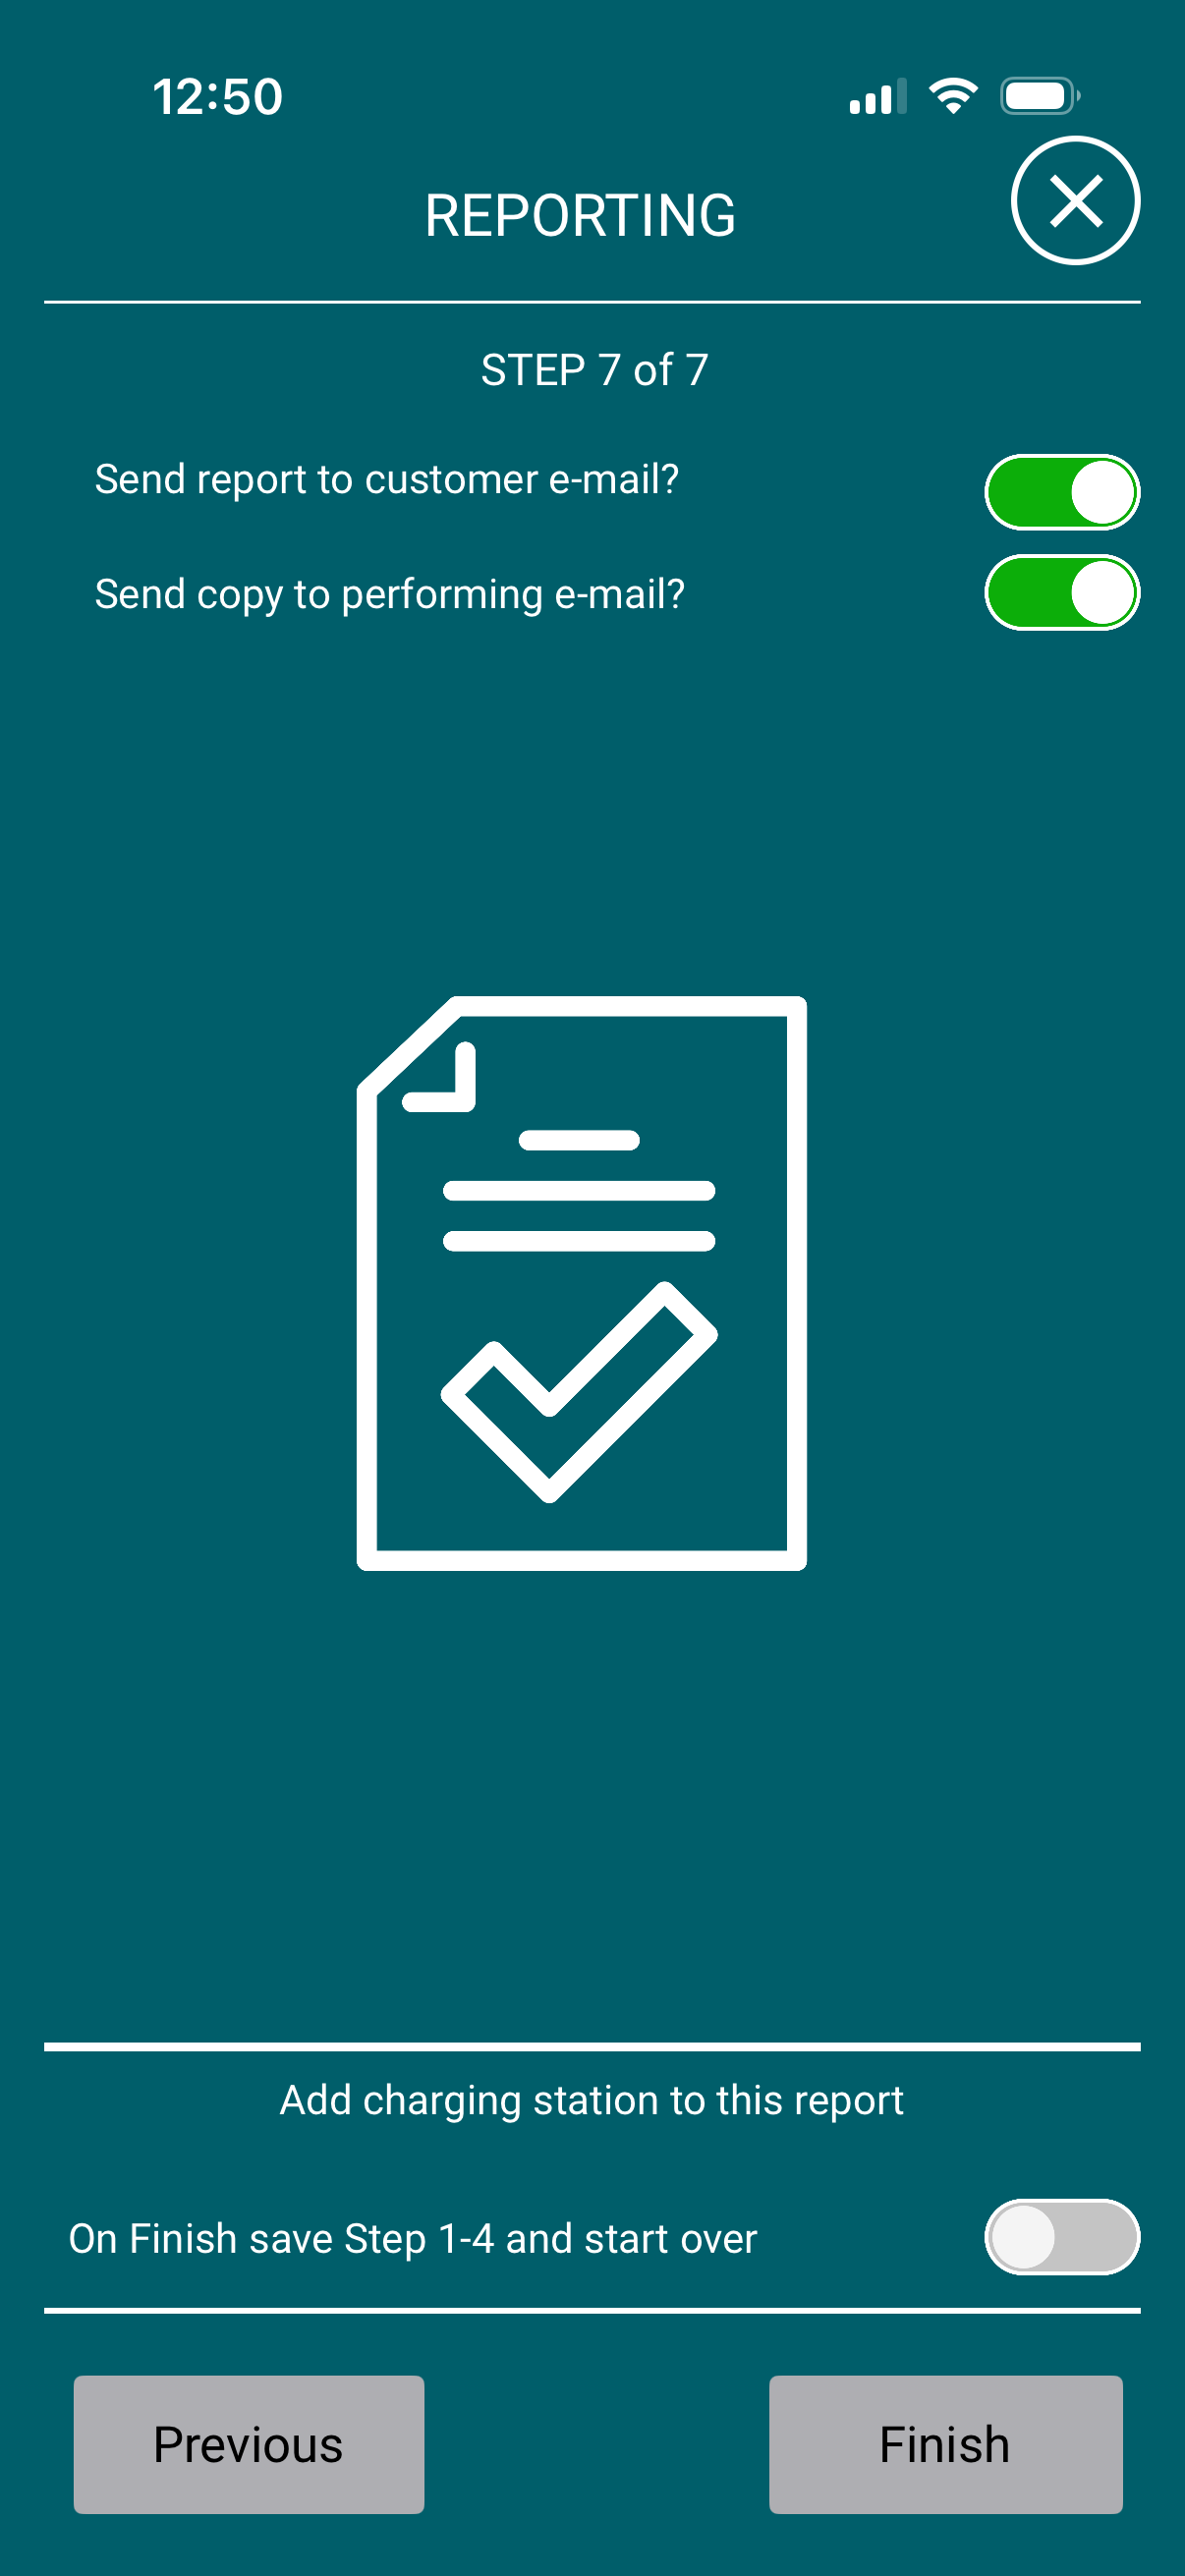
Choose where the finished PDF should go:
- Send report to customer — emails the report to the customer address.
- Send copy to performing company — keeps a copy for your own records.
- Add charging station to this report — reuse the company, customer and address details to quickly document another charger at the same site.
Tap Finish and the report is generated and emailed automatically.
The Viking Two device
A quick guide to the hardware itself — what it does and how to look after it.
What it is
A portable tester that safely mimics an electric vehicle to a Mode 3 Type 2 charging station, so you can function-test without a real car.
How it connects
Plug it into the station's Type 2 socket, then pair it with the app over Bluetooth.
What it reads
Control Pilot duty & frequency (available current), phase presence (L1/L2/L3), cable coding and the proximity (PP) signal.
What it simulates
Vehicle states (disconnected / connected / charging), a pilot fault, and different cable coding values.
Battery
Rechargeable. Check the level in the app menu and recharge when low so it's ready in the field.
Firmware
The version is shown in the app menu. Keep it updated for the latest features and fixes.
Frequently asked questions
Quick answers to the most common questions. Tap a question to expand it.
My device doesn't appear in the list. What do I do?
- Make sure the device is switched on and its battery isn't flat.
- Stay within a few metres of the device.
- Check that Bluetooth is enabled on your phone and that the app has Bluetooth permission.
- Close and reopen the app to restart the scan, or toggle the device off and on again.
Why does the app ask for Location permission?
What does "Available current" mean?
What's the difference between Disconnect, Connect and Charge?
- Disconnect — no vehicle connected (safe state).
- Connect — vehicle plugged in but not charging.
- Charge — vehicle ready and requesting power, so the station closes its contactor.
What does the Auto-Test result tell me?
Do I need to be online to fill in a report?
Can I document several chargers at the same site?
Who receives the finished report?
How do I change the language?
How do I connect the Viking Two device to a charging station?
How do I check the battery and firmware?
What does "Cable coding" show?
What is the PP signal?
Is Viking Two a replacement for a calibrated safety tester?
How do I look after the device?
- Recharge it before it goes flat so it's ready in the field.
- Keep it dry and store it in its case.
- Keep the firmware updated via the app for the latest improvements.